Weigh, Autolyse, Fold, Chill: Pizza Dough Hydration for Home Bakers
Practical science advice for home bakers: why 60–70% hydration works, plus weighing, autolyse, folding, and cold retard tips.
Pizza dough hydration is the ratio of water to flour by weight, expressed as a percentage, and for most home ovens the practical sweet spot sits between 60% and 70%. Traditional Neapolitan dough runs lower, within the range defined by AVPN guidelines, while anything above 70% counts as high-hydration territory that trades easier handling for a lighter, more open crumb. The trade-off is always the same: more water gives you extensibility and bigger bubbles in the crust, but it also makes the dough stickier and less forgiving in a home oven that can’t hit professional pizzeria temperatures.
TL;DR:
- Home oven-based pizza dough hydrations between 60% and 70% provide a balance of handleability and open crumb, while above 70% requires stronger flour and technique.
- Accurate hydration depends on precise weight measurements, with water from milk or eggs counting toward hydration, but oil does not.
- Handling higher hydration doughs requires techniques like autolyse, stretch-and-fold, and using semolina for dusting to prevent sticking and tearing.
- Long cold retardations deepen flavor and firm up high-hydration dough, with dough temperature and poke tests guiding proofing.
- Flour strength, water chemistry, and oven conditions significantly influence hydration performance and dough behavior, not just the hydration percentage itself.
Table of Contents
- What Pizza Dough Hydration Means and How to Calculate It
- What Do Different Hydration Ranges Actually Do to Your Dough?
- Does Flour Strength Really Change How Much Water You Can Use?
- How Do You Actually Handle Wetter Dough Without a Mess?
- How Should Fermentation Change With Higher Hydration?
- What Oven Settings Work Best for High-Hydration Dough?
- Why Is My Dough Sticky, Slack, or Collapsing?
- Worked Examples: Water Amounts for Common Hydration Levels
- Stop Chasing the Number, Start Chasing the Result
- Want Correctly Hydrated Dough Without the Trial and Error?
- Where to Learn More About Pizza Dough Hydration
- Sources
What Pizza Dough Hydration Means and How to Calculate It
Hydration is baker’s percentage, not a household measurement. Hydration is calculated by dividing the weight of water by the weight of flour, multiplied by 100, with flour treated as 100%, and every other ingredient gets expressed as a percentage of that flour weight.
Here’s how that plays out in grams, since weighing beats measuring by volume every time:
- Examples of flour and water ratios include 500 g flour with hydration around 60%, 1,000 g flour with hydration near 65%, and 1,000 g flour with hydration near 70%.
That math looks clean until you add milk, eggs, or oil to the mix. Pizza University’s guidance on true hydration draws a clear line here: water contributed by milk or eggs counts toward hydration because it’s free water available to hydrate the flour’s proteins and starches, but oil doesn’t count, because fat molecules don’t hydrate anything. A dough with 2% olive oil and 62% water counts as 62% hydration only. It’s 62%, with the oil doing a separate job entirely, something covered in more detail in our note on adding olive oil after hydration.
Get a digital kitchen scale accurate to 1 gram before you worry about anything else. Volume measurements (cups, tablespoons) introduce enough error that a “60% hydration” recipe measured by volume could easily be anywhere from 55% to 65% in reality. If you want to skip the mental math entirely, Dough Dorks’ dough calculator converts any flour weight into exact gram amounts for water, salt, and yeast at whatever hydration you’re targeting.
What Do Different Hydration Ranges Actually Do to Your Dough?
Choosing a band isn’t about chasing the highest number you can manage. It’s about matching hydration to your flour, your oven, and what you actually want on the plate.
- 55–62% (traditional Neapolitan): This is the AVPN-defined range for Verace Pizza Napoletana. Dough here is firm, easy to shape, and forgiving for beginners, but it needs a hot oven (AVPN specifies wood-fired ovens near 430°C to 480°C) to puff properly in 60 to 90 seconds. Try it at home and you’ll get a good pizza, just a denser one than a pizzeria’s.
- 60–65% (the home sweet spot): Workshop-tested guidance from PizzaStunde puts this range as the most forgiving for standard home ovens topping out around 250°C to 300°C. It’s sticky enough to open up during baking but stable enough to shape without a fight.
- 65–74% (open-crumb artisan style): Dough here behaves more like a ciabatta. Big irregular bubbles, a chewier bite, and noticeably more attention needed during shaping and transfer to the peel.
- 75%+ (high-hydration territory): Milk Street’s tested recipe runs around 76% and demands strong flour, patience, and technique to keep the structure from collapsing into a puddle.
It’s forgiving enough to learn shaping technique without fighting a dough that sticks to everything, including itself.
Does Flour Strength Really Change How Much Water You Can Use?
The same hydration percentage behaves completely differently depending on flour. That difference comes down to a number most home bakers never look at: W-value, a measure of flour strength used mainly in Italian milling that reflects how much water the gluten network can absorb and hold without breaking down.
Higher W-value flours (roughly W280 and above) have more and stronger gluten-forming proteins, so they can absorb more water and still hold their shape through a long fermentation. Weaker flours, often labeled simply “plain” or “all-purpose” without a W-value listed, saturate faster and turn slack at lower hydration levels.
Water chemistry matters too. AVPN’s own guidance notes that moderately hard water strengthens gluten development, while very soft water weakens it and very hard water can make dough overly tight and tenacious. If your tap water is heavily filtered or unusually soft, don’t be surprised if your usual hydration percentage suddenly behaves differently.
- Hot, humid kitchens: drop hydration 1% to 3% since flour absorbs ambient moisture and dough feels wetter than the percentage suggests.
- Cold, dry winter air: you can often push 1% to 2% higher without the dough turning unmanageable.
- When in doubt, judge by feel, not just the number on your recipe.
Pro Tip: Keep a simple log of flour brand, hydration percentage, and how the dough felt at each stage. After three or four bakes with the same flour, you’ll know its real ceiling better than any spec sheet tells you.
How Do You Actually Handle Wetter Dough Without a Mess?
High-hydration dough doesn’t respond well to brute-force kneading. The fix is time and technique, not horsepower.
- Autolyse first. Mix just flour and water and let it rest 20 to 60 minutes before adding salt and yeast. This gives enzymes time to start breaking down starches and lets gluten strands begin forming on their own, cutting down on the mixing work needed later.
- Add salt and yeast, then mix briefly. Salt tightens gluten structure, so adding it too early can fight the autolyse’s loosening effect.
- Run a fold schedule instead of extended kneading. A common approach is four sets of stretch-and-fold spaced 30 minutes apart over roughly two hours of bulk fermentation. Each fold reintroduces oxygen, which helps disulfide bonds reform and gradually stabilizes an otherwise slack, extensible dough.
- Rest fully between folds. Don’t rush this. The dough needs the full interval to relax and let gluten reorganize before the next fold.
Above that, a stand mixer on low speed for short bursts, followed by hand folds, tends to give more consistent results than either method alone.
For surface handling, keep semolina flour nearby rather than more all-purpose flour for dusting your peel and bench. Semolina’s coarser texture prevents sticking without getting absorbed into the dough the way fine flour does, and it won’t toughen the crust the way extra flour worked into the surface can.
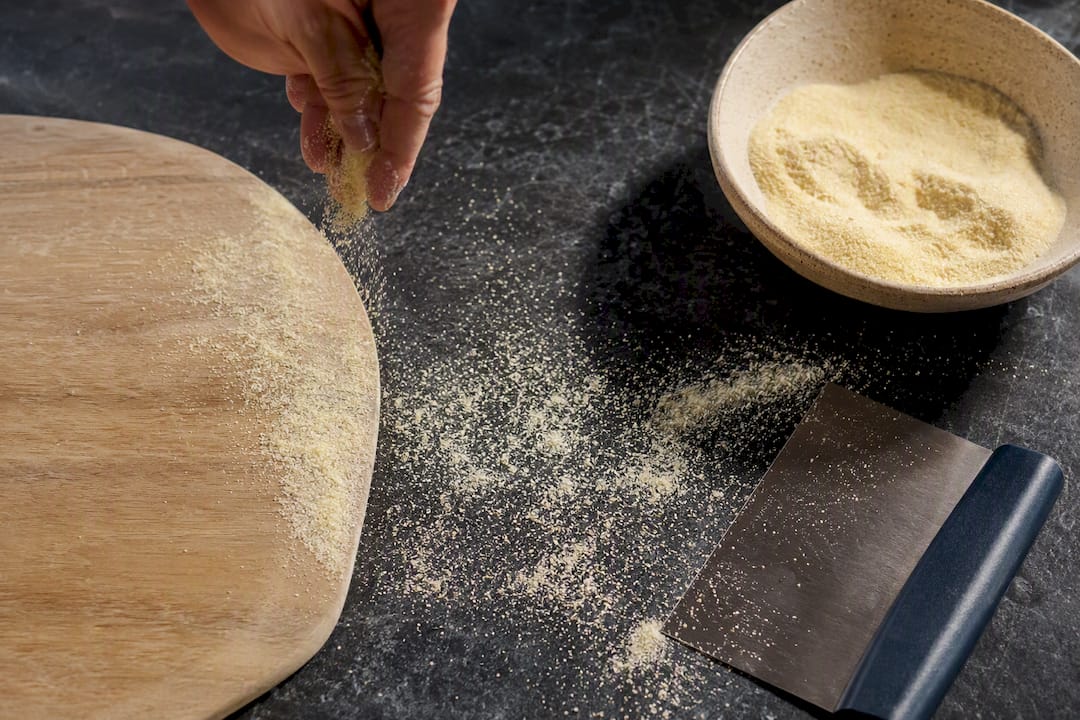
Pro Tip: If dough sticks to your hands during folds, resist the urge to add flour to the dough itself. Wet your hands under the tap instead. A little extra surface water evaporates in the oven; extra flour worked into wet dough changes your hydration math entirely.
How Should Fermentation Change With Higher Hydration?
Cold retarding for 24 to 72 hours in the refrigerator does more than build flavor. It firms up wet dough considerably, since cold temperatures slow yeast activity and let gluten structure set without the dough overproofing or collapsing under its own extensibility.
- Same-day dough: use warmer water, around 75°F to 80°F, to speed fermentation when you don’t have a multi-day window.
- Long cold retard (48 to 72 hours): use cooler water, closer to 60°F to 65°F, since the fridge will do most of the fermentation work over time anyway.
- Target dough temperature: most home bakers aim for a finished dough temperature around 75°F to 78°F right after mixing, adjusting water temperature to compensate for a warm or cold kitchen.
Judging readiness gets trickier as hydration climbs. Instead, rely on the poke test: press a floured finger into the dough and watch the rebound. Slow, partial rebound signals properly proofed dough; instant full rebound means it needs more time. For more detail on timing and proofing signals across hydration levels, a dedicated proofing guide walks through the visual cues stage by stage.
What Oven Settings Work Best for High-Hydration Dough?
Home ovens aren’t built like pizzerias, and that gap matters more as hydration climbs. A wood-fired oven running at 430°C to 480°C can set a crust in under 90 seconds, driving off surface moisture before the interior turns gummy. Most home ovens top out between 250°C and 300°C, so wetter dough needs a different strategy to avoid trapping steam inside a crust that hasn’t set yet, as PizzaBlab’s science-based breakdown points out.
- Preheat a pizza stone or steel for a full 45 to 60 minutes at your oven’s maximum temperature; steel holds and transfers heat faster than stone, cutting bake time by a minute or two.
- Position the rack in the upper third of the oven, then switch to the broiler for the final 60 to 90 seconds to color the top without overbaking the base.
- Dust the peel generously with semolina, not flour, right before the transfer. Wet dough sitting on a peel for more than 30 seconds starts sticking, so have your toppings ready before you shape.
- Keep toppings thinner than you would on a low-hydration crust. Excess sauce or cheese adds moisture the crust already struggles to shed.
If your crust keeps browning on top while staying pale and underbaked on the bottom, that’s a strong sign your stone or steel wasn’t fully preheated. Give it another 15 minutes next time rather than raising the oven temperature further.
Pro Tip: Par-baking your base for 90 seconds before adding toppings gives high-hydration dough a head start on structure, especially useful if your oven can’t sustain pizzeria-level heat.
Why Is My Dough Sticky, Slack, or Collapsing?
Most hydration problems trace back to one of three causes: underdeveloped gluten, overproofing, or simply too much water for your flour’s strength. Matching symptom to cause saves you from guessing.
- Sticky dough that won’t hold shape: usually underdeveloped gluten rather than excess water. Add one or two extra stretch-and-fold sets before blaming the hydration percentage itself.
- Slack, spreading dough that won’t hold a ball: often a sign of overproofing. Move it to the fridge immediately to slow fermentation, and shorten your next proof by 30 to 60 minutes.
- Dough that tears instead of stretching: points to a flour that’s too weak for the hydration you’re attempting. Drop hydration by 1% to 2% next batch, or switch to a stronger flour with a higher W-value.
- Dough that collapses during a long cold retard: can signal excessive amylase activity breaking down starch structure over time, particularly with flours that have a low falling number. Shortening the retard or switching flour brands usually fixes it.
- Persistent stickiness despite good gluten development: reach for semolina on your hands and bench rather than more flour, and keep your dough scraper close during shaping.
Before you change your hydration percentage at all, rule out fermentation timing and flour strength first. Most “sticky dough” complaints are really “underdeveloped dough” complaints wearing a different label.
Worked Examples: Water Amounts for Common Hydration Levels
Here’s a quick reference for converting flour weight into water weight at the hydration levels covered above.
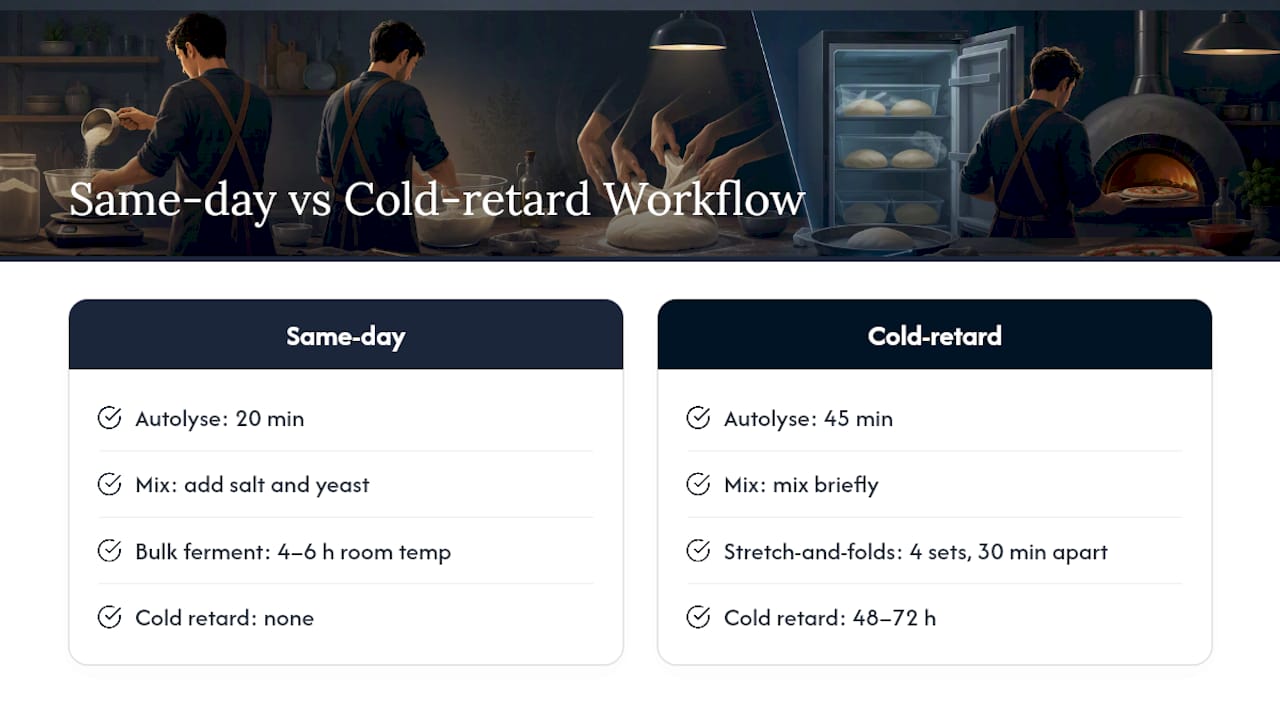
Autolyse 20 minutes, mix in salt and yeast, bulk ferment 4 to 6 hours at room temperature, shape, and bake same day.
Autolyse 45 minutes, mix briefly, then run four stretch-and-fold sets 30 minutes apart. Cold retard 48 to 72 hours, bring to room temperature for 2 hours before shaping, and handle exclusively with wet hands or semolina.
The dough calculator makes recalculating every ingredient at a new percentage instant, so there’s no excuse for eyeballing it.
Stop Chasing the Number, Start Chasing the Result
Hydration is one variable among several, and it’s rarely the one worth maximizing first.
Change one thing at a time. That single habit teaches you more in a month than any hydration chart will teach you in a year.
Flour selection and fermentation control matter more than the number itself. A quality Italian 00 flour, handled with a proper fold schedule and a cold retard, will outperform a higher-hydration dough made with weak flour and rushed technique nearly every time. If you’d rather skip the trial-and-error phase entirely, Dough Dorks’ pre-fermented dough balls and 00 flour give you a tested starting point to build technique on, and the dough calculator removes the guesswork from scaling any recipe up or down.
— Michael
Want Correctly Hydrated Dough Without the Trial and Error?
Learning hydration by feel takes a few dozen bakes to really click, and not everyone has the time to burn through that many failed attempts before dinner needs to happen. This dough balls are fermented for 48 hours at a hydration level tuned for home ovens, so you get the extensibility and open crumb of a well-managed high-hydration dough without measuring a single gram of water yourself.

The 48-hour sourdough pizza dough balls are the closest thing to a shortcut through everything covered above. Made with Italian 00 flour and fermented long enough to develop real structure and flavor, they let you focus entirely on shaping, topping, and oven technique while the hydration and fermentation work is already done. If you’d rather bake something with a flavor twist built in, the Italian herb Neapolitan dough balls fold dried herbs directly into a correctly hydrated Neapolitan-style dough. Either option gets you a properly hydrated base on your first attempt, freeing up your next few bakes to experiment with the folding and fermentation techniques above instead of troubleshooting a dough that’s fighting you.
Where to Learn More About Pizza Dough Hydration
The claims and ranges covered here draw on a mix of traditional guidance and tested recipe science, worth bookmarking if you want to go deeper on any single piece.
- AVPN’s official dough hydration guidance for traditional Neapolitan ranges and water quality notes
- PizzaBlab’s science-based guide on how hydration affects extensibility and crumb structure
- Milk Street’s tested high-hydration recipe for technique at 76% hydration
- PizzaStunde’s workshop notes comparing 60%, 70%, and 80% hydration
Sources
- Pizzastunde
- High-Hydration Pizza Dough | Christopher Kimball’s Milk Street
- Understanding Pizza Dough Hydration: A Science-Based Guide | PizzaBlab
Recommended
- Secrets to Perfect, Chewy Pizza Dough: Tips for Delicious Crust
- How to Proof Pizza Dough: Time, Temp & Signs It’s Ready
- How to Par Bake Pizza Dough for a Crispier Crust
READY-MADE • FROZEN • UK DELIVERY
Skip the mixing. Keep proper dough in your freezer.
48-hour fermented, individually proofed in their own pot and delivered frozen across the UK. Defrost, stretch, top and bake.
-
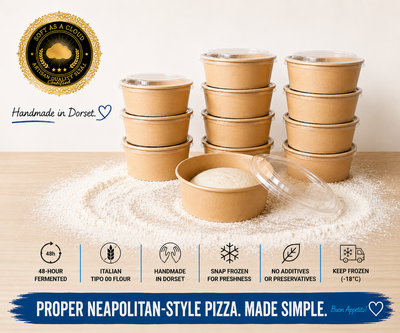 48-Hour Neapolitan-Style Pizza Dough Balls – Box of 12
£22.88
-
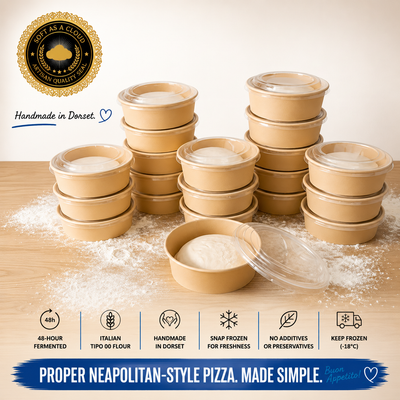 48-Hour Neapolitan-Style Pizza Dough Balls – Box of 20
£32.30
-
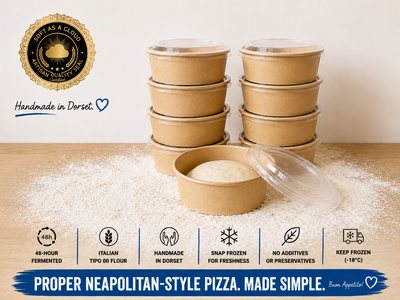 48-Hour Neapolitan-Style Pizza Dough Balls – Box of 8
£18
Handmade in Dorset • Free UK delivery over £50 • Free proofing pot with every dough ball