48 Hour Cold Fermented Pizza Dough for UK Home Cooks, Exact Formula
Get better browning and complex flavor in a UK oven with a 48 hour cold ferment. Exact 70% formula, yeast dosing, tempering times, troubleshooting and a...
The best home approach is a cold ferment of 24 to 72 hours, with 48 hours as the sweet spot for flavor and workability. A reliable base formula runs 500g flour, 350g water (70% hydration), 13g salt, and just 1 to 1.5g instant yeast, mixed and cold retarded before a final room temperature proof. The rest of this guide walks through the timing, the ingredient math, and the troubleshooting that make that formula actually work.
TL;DR:
- Reducing yeast from 1.5g to 1g for a 48-hour ferment prevents over-proofing and maintains dough structure.
- Hydration levels of 60-65% suit standard home ovens, while 68-72% hydration benefits high-heat outdoor or steel/stone setups.
- Proper planning of the fermentation schedule is crucial: 24 hours with overnight refrigeration, 48 hours with two days in the fridge, or 72 hours with room temperature proofing followed by fridge rest.
- Dough should be tempered for 2 to 3 hours before shaping to ensure it is soft, relaxed, and easy to stretch without tearing.
- Buying ready-made 48-hour fermented dough simplifies the process for those short on time or wanting consistent, pizzeria-quality results.
Table of Contents
- What Is Cold Fermented Pizza Dough and Why Does It Work?
- Getting the Ingredients and Hydration Right
- How to Plan a 24, 48, or 72 Hour Schedule
- How Do You Make Cold Fermented Pizza Dough Step by Step?
- Troubleshooting Sticky, Tight, or Pale Dough
- Why Trust This Cold Ferment Method
- How Long Should Dough Rest Before Shaping?
- Why Most Home Recipes Get Cold Fermentation Half Right
- Skip the Timing Math With Ready-Made Dough
- Sources
- FAQ
What Is Cold Fermented Pizza Dough and Why Does It Work?
Cold fermented pizza dough is dough that spends most of its rise time in the refrigerator instead of on the counter, letting enzymes do the flavor work that yeast normally rushes past. At room temperature, yeast eats sugars and produces carbon dioxide so fast that the dough is ready in a couple of hours, but it never develops much complexity. Drop that same dough into a fridge at around 4°C, and yeast activity falls to a fraction of its room temperature rate, while enzymes like amylase and protease continue working at a substantial fraction of their normal speed(https://jayarr.pizza/blog/pizza-dough-cold-fermentation/).
That gap is where the flavor comes from. Amylase breaks starches into simple sugars. Protease breaks proteins into free amino acids. Both processes feed into Maillard browning once the dough hits a hot oven, which is why cold fermented crusts brown better and taste noticeably more complex than same-day dough, even in ovens typical for home use.
Duration changes the outcome in predictable ways:
- 24 hours: Mild improvement over same-day dough. Good crumb, subtle tang, still fairly neutral flavor.
- 48 hours: The point most bakers land on. Noticeable sweetness from sugar development, better extensibility, and a crust that browns more evenly.
- 72 hours: Maximum complexity for most home flours, with a more pronounced tang and looser, more open crumb structure.
- Beyond 72 to 96 hours: Risk starts climbing. Over-acidity and protein breakdown can leave dough slack and tricky to shape, an effect that shows up faster with weaker flours.
Longer fermented dough is also just easier to work with. Extended enzyme activity relaxes gluten, so 48 and 72 hour dough stretches thinner without tearing or snapping back, which matters if you’re chasing a proper Neapolitan-style edge at home. It also buys you scheduling freedom. Once dough balls are made and dated, you can bake on any day within the window instead of committing to a single dinner slot.
Cold fermentation doesn’t just improve flavor. It’s the closest thing home cooks have to buying more time from their yeast, since enzymes keep maturing the dough long after the yeast itself has slowed to a crawl.
Getting the Ingredients and Hydration Right
Flour choice sets the ceiling on how far you can push a cold ferment. A finely milled Italian 00 flour such as Caputo, a brand commonly stocked by pizzerias and home bakers alike, gives dough enough gluten strength to survive 48 to 72 hours in the fridge without turning to mush, while still stretching thin for a Neapolitan-style crust. A standard bread flour works too, and often holds structure even better over very long ferments because of its higher protein content.
Hydration decides how the crust behaves in your specific oven:
- 60 to 65% hydration suits a standard home oven that tops out around 250°C (480°F). Lower hydration dough is firmer, easier to handle, and less likely to steam out before it browns.
- 68 to 72% hydration works best with an outdoor pizza oven or a steel/stone setup that pushes past 290°C (550°F), where the extra water helps produce an open, airy crumb without drying out the crust.
Yeast quantity should be reduced as fridge time increases, since even a small overdose of yeast will blow past its food supply and collapse the dough before day three. A workable baker’s percentage table for instant dry yeast (IDY) looks like this:
| Fridge time | IDY (baker’s %) | Grams per 500g flour |
|---|---|---|
| 24 hours | 0.3% | 1.5g |
| 48 hours | 1 to 1.5g instant yeast | 1 to 1.5g instant yeast |
| 72 hours | 1 to 1.5g instant yeast | 1 to 1.5g instant yeast |
Fresh yeast runs about double the instant dry weight and behaves more predictably at cold temperatures, which is one reason many pizzerias prefer it.
Pro Tip: Calculate your water temperature backward from a target final dough temperature (FDT) of around 80 to 82°F. If your flour and kitchen are warm, use colder water; a simple rule is water temp = (2 x target FDT) minus room temp minus flour temp.
If you’re working with an unusually strong flour (a high “W” rating), consider trimming the fridge time slightly or degassing the dough once partway through, since dense gluten structure resists protease longer and can overdevelop if left untouched for the full 72 hours.
How to Plan a 24, 48, or 72 Hour Schedule
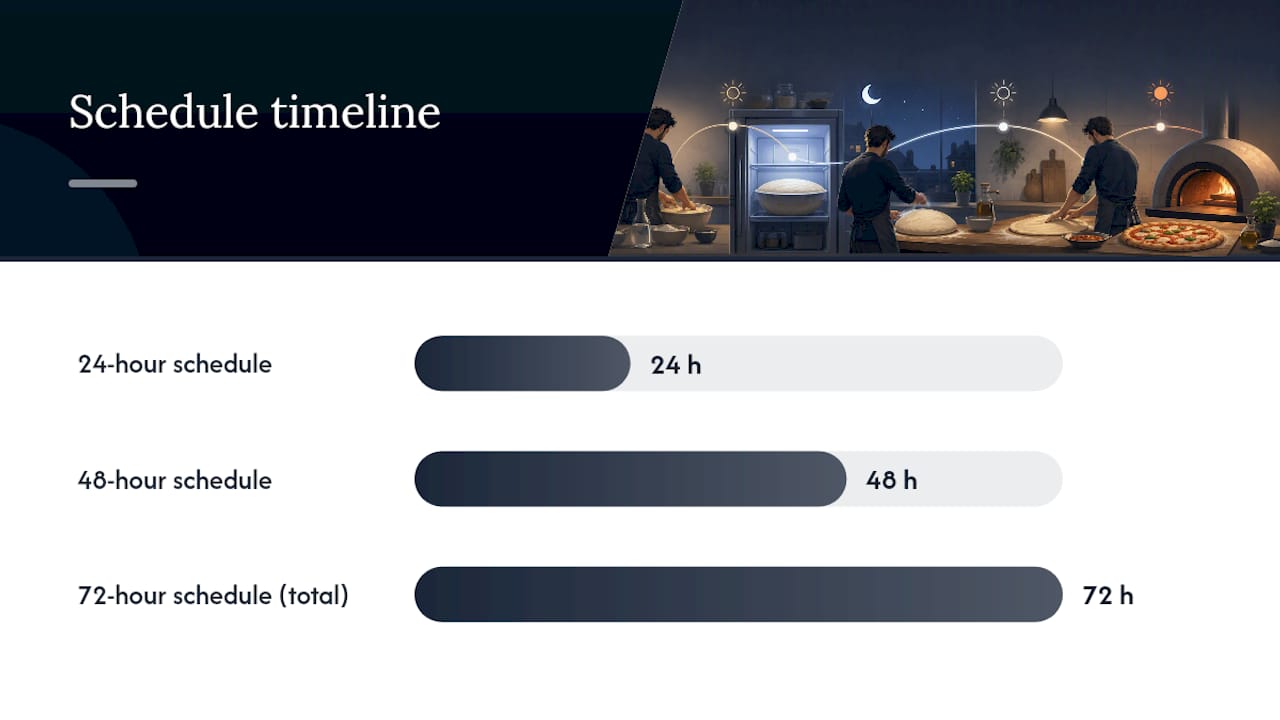
Cold fermented pizza dough only works on your timeline if you actually plan the fridge time around when you want to eat. The three schedules below cover most home situations, and you can pick based on how far ahead you’re organized.
- 24 hour dough: Mix in the evening, ball immediately, refrigerate overnight and through the next day, then temper 2 to 3 hours before baking that evening.
- 48 hour dough: Mix and ball on day one, refrigerate for two full days, then pull dough out 2 to 4 hours before your bake on day three.
- 72 hour dough (the tested workflow): Mix and bulk ferment at room temperature for 24 hours, then divide, ball, and refrigerate for 48 more hours before baking.
Using lidded and lightly oiled containers helps dough rise smoothly during cold fermentation, avoiding sticking and damage., since wrap tends to stick and tear the dough skin when you unwrap it. Leave headspace, roughly double the ball’s current volume, so the dough has room to expand without lifting the lid. Label each container with the mix date and target bake day; it’s easy to lose track of which ball is on day one versus day three once a few are stacked in the fridge.
Keep your fridge at or near 4°C (39°F) for anything you plan to hold longer than 24 hours. If plans change and you need an extra day beyond your original target, a slight yeast reduction up front gives you a buffer, but Extended fermentation beyond about four days risks over-acidity and structural breakdown unless formula adjustments are made that shows up as a slack, tearing dough. For more detail on choosing between windows, see this breakdown of fridge time for pizza dough.
How Do You Make Cold Fermented Pizza Dough Step by Step?
This method covers the full sequence for a 500g flour batch (roughly three to four 12 inch pizzas), plus a no-knead variant for anyone who wants less hands-on work.
Equipment: a kitchen scale accurate to 1g, an instant read or dough thermometer, two or three lidded containers, and a pizza stone or steel for baking.
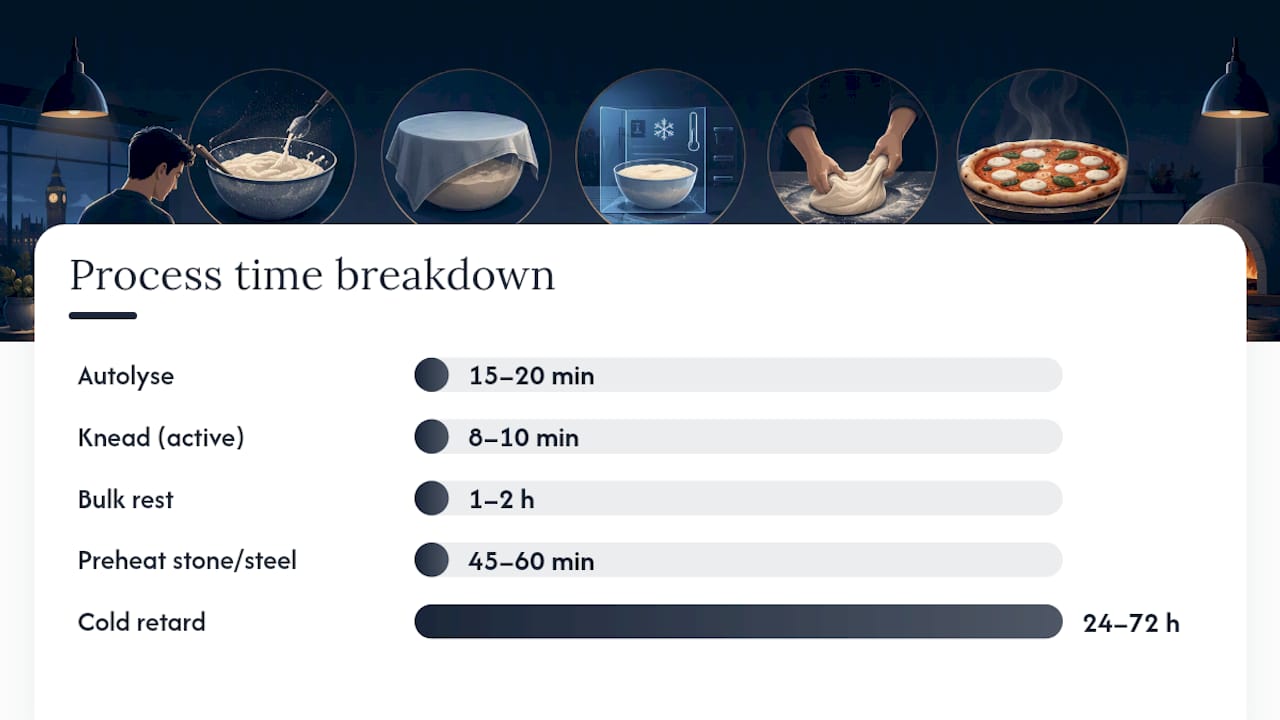
- Mix the dough. Combine 500g 00 flour or bread flour with 350g water (70% hydration) and your calculated yeast dose. Mix by hand or stand mixer until no dry flour remains, then rest 15 to 20 minutes (an autolyse) to let the flour hydrate fully.
- Add salt. Sprinkle in salt around 2.5% of flour weight after the autolyse rest, not before, since salt slows gluten formation if it hits the flour too early. Mix until fully incorporated.
- Knead or fold. Knead by hand for 8 to 10 minutes until the dough passes the windowpane test, or use four rounds of stretch and fold at 20 minute intervals if you prefer a gentler approach.
- Bulk rest. Let the dough sit covered at room temperature for 1 to 2 hours (or the full 24 hours if following the 72 hour schedule), until it visibly puffs and feels slightly airy.
- Divide and ball. Cut the dough into 200 to 220g pieces for 12 inch pizzas. Shape each into a tight ball by folding the edges under and pinching the seam closed on the underside.
- Container and chill. Place each ball in its own lightly oiled, lidded container with headspace, label with the date, and refrigerate immediately.
- Cold retard. Leave undisturbed for your chosen window, 24, 48, or 72 hours, at roughly 4°C.
- Temper. Pull dough balls out 2 to 5 hours before baking depending on ball size and kitchen temperature, letting them come fully to room temperature before shaping.
- Shape and bake. Stretch gently from the center outward, dock any large bubbles, top, and bake on a preheated stone or steel.
No-knead variant: skip step 3 entirely. Mix flour, water, and yeast by hand just until combined, add salt, and use a wet spoon or spatula to fold the dough four or five times inside its container rather than kneading. This approach, popularized in Lahey-style recipes, trades some dough strength for a much easier process, and it pairs naturally with a 72-hour no-knead schedule since the extra fridge time compensates for the lighter mixing.
Pro Tip: Preheat your stone or steel for a full 45 to 60 minutes before baking. A stone that looks hot after 15 minutes usually hasn’t stored enough heat to give you real oven spring on a home setup.
Troubleshooting Sticky, Tight, or Pale Dough
Overproofed dough feels slack, tears easily when stretched, and may smell noticeably sour or boozy. If you catch it early, a quick fold and a slightly hotter, faster bake can salvage it; if it’s badly overproofed and won’t hold a shape at all, it’s better used as a flatbread than forced into a round pizza.
Underproofed dough does the opposite: it fights back when stretched, springs to a smaller size almost immediately, and bakes up dense. The fix is more time, not more heat. Let it sit at room temperature another 30 to 60 minutes before trying again.
Common fixes worth knowing:
- Too sticky: Dust hands and surface lightly with semolina or flour rather than adding more flour to the dough itself, which throws off your hydration math.
- Too tight, won’t stretch: Give it another 20 to 30 minutes at room temperature; cold dough resists stretching far more than gluten structure alone would suggest.
- Pale crust: Usually an underheated oven or stone. Preheat longer, and check that your oven’s actual temperature matches the dial (many run cooler than displayed).
- Collapsed or torn dough: Handle it less. Every extra press or fold releases gas you can’t get back; shape with the fewest movements possible.
A properly tempered ball should feel soft, slightly tacky, and stretch without springing back or tearing. For more detail on reading these signs, see this guide on proofing time and readiness.
Why Trust This Cold Ferment Method
Some businesses build their entire operation around getting cold fermentation right at scale, testing timing and hydration variables far beyond what a single home batch would reveal. The company’s 48-hour fermented dough balls use Italian 00 flour, fresh yeast, and extra virgin olive oil, following the same 48 hour sweet spot outlined throughout this guide.
That expertise shows up in educational content published on proofing signs, fridge timing, and dough readiness, covering the same fundamentals built from experience producing cold fermented dough consistently rather than one-off home trials.
Buying ready-made dough makes sense in a few specific situations:
- You’re hosting a pizza night and don’t have three days to plan a ferment.
- You want pizzeria-consistent results without managing yeast math yourself.
- You’re feeding a group and need multiple balls ready at once.
Home bakers who enjoy the process still get the most control by mixing their own, but anyone short on time gets the same 48-hour benefit without the planning.
How Long Should Dough Rest Before Shaping?
Cold dough straight from the fridge is stiff, cold to the touch, and prone to tearing if you try to stretch it right away. It needs time to warm back up and relax before it will cooperate.
For a single 200 to 220g ball, 2 to 3 hours at room temperature is usually enough on a mild day. Larger batches, a full tray of balls pulled at once, or a cooler kitchen can push that closer to 4 or 5 hours. Ooni recommends tempering times ranging from around one to five hours depending on dough mass and ambient temperature(https://ooni.com/blogs/recipes/cold-prove-pizza-dough) depending on dough mass and ambient temperature.
Skipping this step is one of the most common reasons home pizza turns out tough or hard to shape. Cold gluten is tight gluten, and no amount of stretching force will compensate for a dough that’s still 40°F in the center. You’ll know it’s ready when the ball has visibly relaxed and spread slightly in its container, feels soft rather than firm when pressed, and gives a little resistance without snapping back hard.
If you’re short on time, spread the balls out with more space between them rather than stacking, and keep them in a slightly warmer spot in the kitchen (never near direct heat) to speed things along. Don’t rush this by skipping straight to shaping cold dough; a torn or thin patch from stretching stiff dough almost always burns through before it bakes properly, since it has no structure left to hold sauce and cheese.
Why Most Home Recipes Get Cold Fermentation Half Right
Most online recipes treat cold fermentation as a single lever: leave the dough alone longer, get better pizza. That’s not wrong, but it skips the part that actually determines whether your 72 hour dough turns out great or turns to soup: yeast dosing has to scale down as fridge time scales up, and almost nobody explains the math behind that tradeoff.
The conventional advice to “just use less yeast for longer ferments” is true but useless without numbers. A 0.3% dose that works fine for 24 hours will overrun a 72 hour ferment and leave you with slack, over-fermented dough by day two. That’s the gap this guide tries to close with actual baker’s percentages instead of vague instructions.
If you take one thing from all this, prioritize the yeast-to-time ratio before you worry about flour brands or hydration percentages. Get that wrong and no amount of Caputo flour or precise water temperature will save the dough. Get it right, and even a modest bread flour at 65% hydration will produce a genuinely good crust.
— Michael
Skip the Timing Math With Ready-Made Dough
If three days of planning yeast percentages and fridge schedules sounds like more commitment than you want for pizza night, 48-hour fermented frozen pizza dough balls let you skip the mixing and fermentation schedule while keeping the hand-stretched pizza experience. The dough is fermented, individually proofed and frozen before delivery, so you can defrost only what you need.

For the classic option, browse our ready-made frozen pizza dough balls. If you prefer a naturally fermented flavour, the sourdough pizza dough balls use the same slow-fermentation approach with a gentle sourdough tang.
This is the right call if you’re hosting a group, working around a busy week, or just want consistent results without babysitting a dough ball for three days. Keep the dough frozen until needed, then defrost it fully and let it relax before stretching.
Sources
These sources informed the timing, formulas, and technique covered throughout this guide:
- 72 Hour Cold Fermented Pizza Dough - Home Cooking Collective
- 72-Hour Pizza Dough Recipe, No-Knead Cold Ferment – Baking Steel
- Cold‑Proof Pizza Dough — Ooni
FAQ
Is Cold Fermentation Better for Pizza Dough?
Yes, in most cases. Cold fermentation develops more sugars and free amino acids through enzyme activity, producing better browning and more complex flavor than same-day dough.
Does Pizza Dough Rise During Cold Fermentation?
It rises slowly.
Is Fermented Dough Better for Pizza Than Same-Day Dough?
Generally yes, because extended fermentation, whether at 24, 48, or 72 hours, gives enzymes time to build flavor compounds that yeast alone can’t produce in a few hours. Doughdorks builds its ready-made dough balls around this same 48-hour window for that reason.
How Long Can I Keep Cold Fermented Dough in the Fridge?
Most home formulas hold well for 24 to 72 hours at around 4°C, with 48 hours widely considered the sweet spot. Pushing much past 96 hours risks over-acidity and a slack, hard-to-shape dough unless the formula is adjusted for it.
Recommended
- The Best Fridge Time for Pizza Dough: 48 to 72 Hours
- How to Proof Pizza Dough: Time, Temp & Signs It’s Ready
- 48hr Neapolitan Pizza Dough By Weight
- Best Pizza Dough Balls for Home Cooks (2026 Guide)
READY-MADE • FROZEN • UK DELIVERY
Skip the mixing. Keep proper dough in your freezer.
48-hour fermented, individually proofed in their own pot and delivered frozen across the UK. Defrost, stretch, top and bake.
-
 48-Hour Neapolitan-Style Pizza Dough Balls – Box of 12
£22.88
-
 48-Hour Neapolitan-Style Pizza Dough Balls – Box of 20
£32.30
-
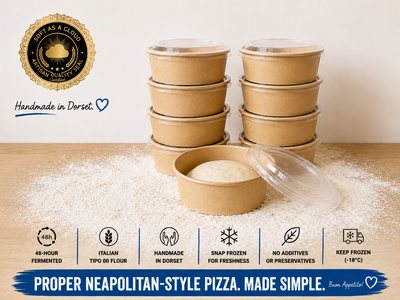 48-Hour Neapolitan-Style Pizza Dough Balls – Box of 8
£18
Handmade in Dorset • Free UK delivery over £50 • Free proofing pot with every dough ball