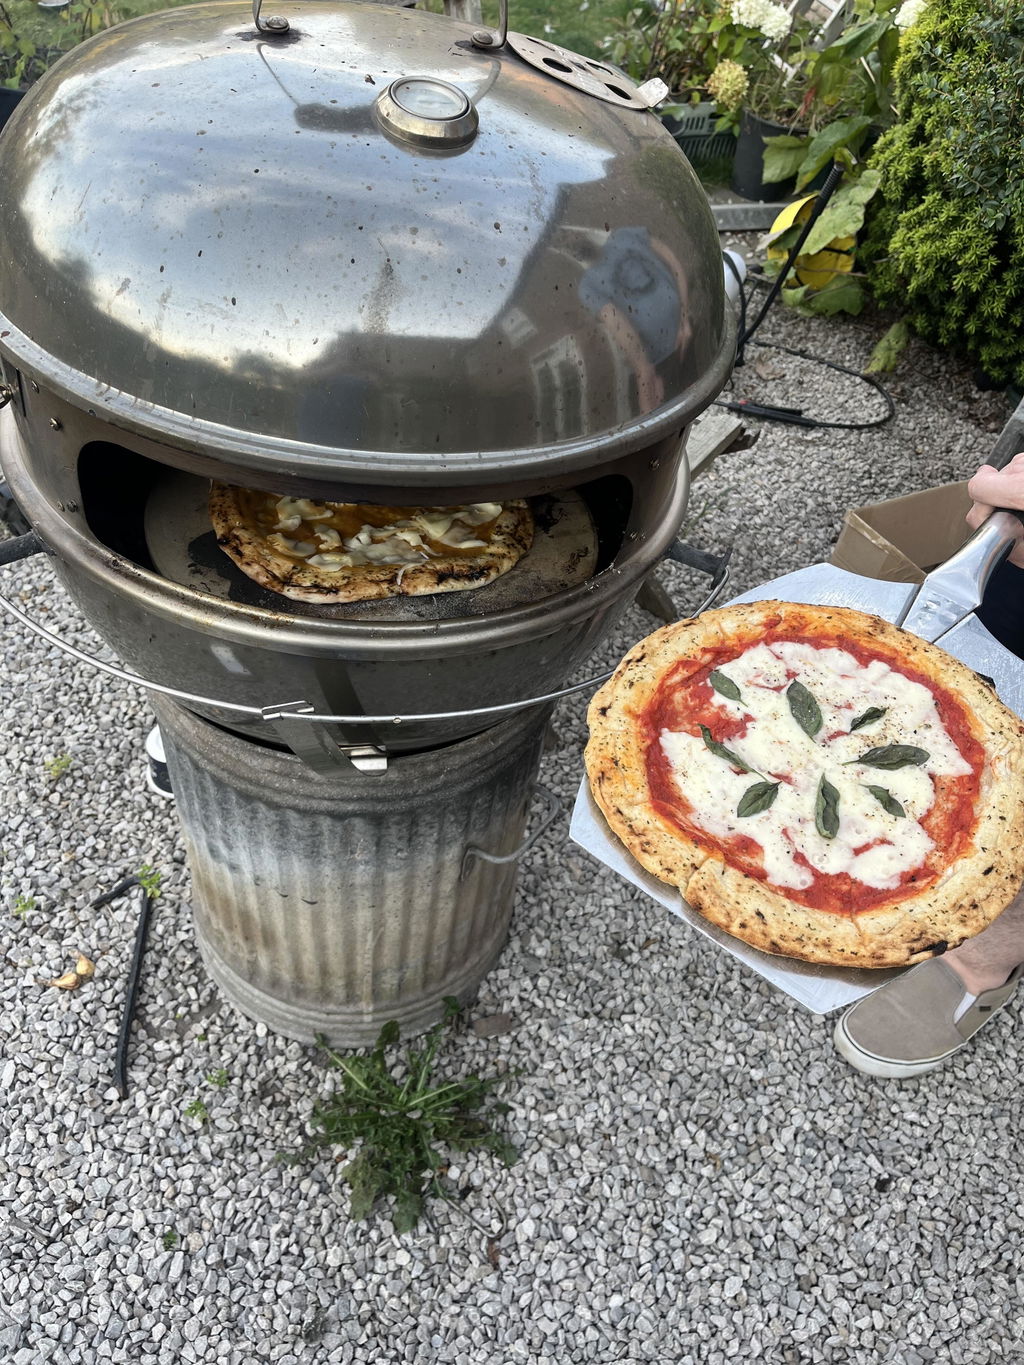
65% Hydration Neapolitan Dough for 750–900°F Wood Fired Home Ovens
Neapolitan recipes and step by step technique for 750–900°F wood fired home ovens. Three skill levels, hydration guidance (60–70%) and 24–72 hour cold...
That dough belongs in a stone or dome heated to 750°F to 900°F (400°C to 480°C), where it bakes in roughly 60 to 90 seconds. Weigh everything on a digital scale and give it a real cold ferment. Everything else in this guide is about adapting that baseline to your oven, your flour, and your patience level.
TL;DR:
- Using a high-temperature oven of 750°F to 900°F is essential for a quick bake of 60 to 90 seconds, with proper dough handling and fermentation being critical.
- Achieving optimal results depends on hydration levels: 60% for beginners, 65% for a balanced crumb with a long cold ferment, and up to 70% for advanced bakers confident in managing sticky dough.
- Dough strength, measured by W value, should be in the 260 to 320 range to withstand long ferments, with 00 flour or a blend with all-purpose flour providing the best texture and flavor.
- Proper hydration, water quality, and fermentation time (24 to 72 hours) significantly influence dough elasticity, flavor development, and oven performance, especially at high heat.
- Ready-made dough balls fermented for 48 hours can simplify the process for home cooks, providing consistent quality without the need for complex setups.
Table of Contents
- Three Pizza Dough Recipes for Different Skill Levels
- Which Flour Actually Works in a High-Heat Oven?
- How Much Water Should Go in Pizza Dough?
- How Long Should Pizza Dough Ferment Before Baking?
- How to Stretch and Launch Pizza Dough Without Tearing
- Getting Your Pizza Oven Ready for High-Heat Baking
- Topping and Assembly Strategy for a 90-Second Bake
- What to Do When Your Pizza Dough Goes Wrong
- How Dough Dorks Supports the Recipes Above
- Does Tap Water Affect Pizza Dough Quality?
- Adjusting Pizza Dough for Altitude and Humidity
- Should You Use a Poolish or Biga for Pizza Dough?
- Should You Score or Dock Pizza Dough Before Baking?
- What Beginners Should Expect From the Learning Curve
- Skip the Fermentation Setup With Ready-Made Neapolitan Dough
- Sources
- FAQ
Three Pizza Dough Recipes for Different Skill Levels
You don’t need one “correct” recipe. You need the right recipe for where you are right now, and for the pie size your oven actually fits.
- Beginner (around 60% hydration). For 1 kilogram of flour, use water and salt amounts suitable for beginner doughs, with yeast adjusted for same-day or cold ferment schedules. Ball sizes should match your oven’s capacity. This dough forgives clumsy hands and holds its shape while you learn to launch.
- Balanced (65% hydration). This is the Ooni Neapolitan-style dough territory: 1kg flour, 650g water, 20g salt, and 3g fresh yeast (roughly 1g instant) for a 24 to 48 hour cold rest. Ball at 275g for a 12-inch pie. It stretches thinner without tearing and gives you a lighter, more open crumb than the beginner formula.
- High-hydration (70%). Reserve this for confident bakers only. The wetter dough sticks to everything, including your hands, but rewards you with a shatter-crisp yet airy crust once you master the handling.
Yeast dosing runs in reverse of what people expect: more yeast for a fast, same-day dough, and less yeast the longer that dough sits in the fridge. A dough resting for 72 hours needs a fraction of the yeast a same-day dough needs, or it overproofs and turns sour and slack.
Which Flour Actually Works in a High-Heat Oven?
Millers also rate dough strength using a W value, a lab measurement of how much energy the dough can absorb before breaking; doughs destined for 24 to 72 hour ferments generally want a W value in the 260 to 320 range, strong enough to survive a long, slow rise without collapsing.
If you can’t source true Italian 00, a blend works fine. Mixing 00 with all-purpose flour at roughly a 50/50 or 70/30 ratio gets you closer to the right protein window while keeping the dough easier to find and cheaper to buy.
- 00 flour alone: best flavor and texture match for true Neapolitan style; needs practice to handle at higher hydration.
- 00/all-purpose blend: more forgiving gluten structure, slightly chewier crust, widely available.
- Bread flour: too strong for most home ovens; produces a tough, overly chewy base unless cut with a softer flour.
Fine sea salt dissolves faster than coarse kosher salt, which matters if you’re mixing by hand rather than machine. For yeast, instant yeast is the simplest to dose accurately; fresh yeast (common in Italian recipes) needs roughly three times the weight of instant yeast to match potency, and a sourdough starter adds tang but demands more experience to time correctly.
Skip the oil and sugar. Fat and sugar in dough accelerate browning and can cause acrid charring once your oven crosses 750°F, which is exactly why the AVPN Neapolitan specification allows only four ingredients: flour, water, salt, and yeast.
Pro Tip: *If your flour bag doesn’t list a W value, check the protein percentage instead.
How Much Water Should Go in Pizza Dough?
This system is why professional recipes travel well between kitchens: it scales cleanly whether you’re making one pizza or twenty.
For outdoor ovens running 750°F to 900°F, 60% to 70% hydration is the sweet spot. Lower hydration in that range handles easier and tolerates beginner mistakes. Higher hydration produces a lighter, more open crumb with bigger air pockets, but the dough turns sticky and unforgiving fast.
A digital kitchen scale removes the guesswork that measuring cups introduce. Weight-based measurement is standard practice for consistent hydration and repeatable results in high-heat baking. Water temperature matters too: warmer water speeds fermentation, so many bakers use cold water straight from the fridge to slow things down during hot summer months and slightly warmer water in winter.
- Always weigh flour and water. Volume measurements vary by up to 20% depending on how you scoop.
- Track your kitchen temperature. A dough that ferments in three hours at 75°F might take five hours at 65°F.
How Long Should Pizza Dough Ferment Before Baking?
A 24 to 72 hour cold ferment in the refrigerator is standard for developing real flavor, and the yeast percentage should sit around 0.3% to 0.4% of flour weight to keep that long rest under control. Push past a 96-hour rest and most doughs turn sour, gassy, and structurally weak, so treat 3 to 5 days as the practical outer limit.
- Mix and bulk ferment. Combine ingredients, knead briefly, then let the whole mass rest at room temperature for 1 to 2 hours before dividing.
- Divide into balls. Portion the dough at your target weight (see the next section) and place each ball into its own lidded container.
- Cold ferment. Refrigerate for 24 to 72 hours, depending on how much flavor development you want and how far ahead you’re planning.
- Warm before shaping. Pull the dough balls out 1 to 2 hours before baking so they can come up to roughly 60°F (15.5°C); cold dough tears and snaps back instead of stretching.
Same-day dough needs three to four times more yeast than a 72-hour version, since it has far less time to develop gluten strength and flavor through slow fermentation alone. That trade-off is real: faster dough means less complexity in the finished crust.
Individual lidded containers for each dough ball prevent them from fusing together in the fridge, which saves you from tearing them apart later and deflating all that hard-won structure. Overproofed dough looks flat, smells distinctly beery or sour, and feels slack and wet rather than springy when you poke it.
Pro Tip: Write the time you portioned each dough ball on its container lid with a marker. When three balls all look the same in your fridge, guessing which one has fermented longest is how you end up with an overproofed pizza.

How to Stretch and Launch Pizza Dough Without Tearing
Dough that’s ready to shape feels relaxed and slightly domed, not tight or resistant when you press a finger into it. If your finger leaves a dent that slowly springs back halfway, you’re close; if it springs back instantly, give it more time at room temperature.
Work from the center outward with your fingertips, pressing gently to push air toward the rim rather than out of it. That outward pressure is what builds the puffy cornicione, the raised edge that chars and blisters in a hot oven. Stretching by pulling the edges thin, rather than rolling with a pin, keeps that trapped air intact.
- Rice flour blended with all-purpose flour for peel dusting resists sticking better than plain flour, and rice flour tends to fall away during baking instead of leaving a gritty texture on the crust.
- Semolina works too and adds a faint nutty crunch, though it’s coarser and can scratch a delicate stone if used heavily.
- If the dough tears while stretching, pinch the tear closed, dust the spot, and let the ball rest for five minutes before trying again. Forcing a torn dough onto the peel almost guarantees a hole once it’s under the toppings.
Before launching, give the peel a firm shake to confirm the pizza slides freely. If it sticks anywhere, lift that edge and add a pinch more flour underneath rather than shaking harder. To launch, pull the peel back slightly as you push the front edge forward and down, letting the pizza slide off onto the stone in one smooth motion rather than a shove.
Pro Tip: Practice your launch motion with a scrap of parchment paper on the peel before you ever put real dough on it. The wrist motion is the same, and there’s no cost to getting it wrong.
Getting Your Pizza Oven Ready for High-Heat Baking
Target 750°F to 900°F (400°C to 480°C) on the cooking stone itself, which typically means letting a wood-fired oven run for 45 minutes to an hour once flames are established. At that range, a pizza cooks in about 60 to 90 seconds, and that speed is the entire point: it sets the crust before the toppings have time to make it soggy.
An infrared thermometer is the only reliable way to check actual stone temperature, since dome temperature and floor temperature can differ by well over 100°F in a wood-fired oven. Aim the pizza toward the section of the dome that isn’t directly over the flame, since that spot tends to run hotter and can scorch a crust before the top even sets.
- Rotate the pizza every 15 to 20 seconds using the peel, since most home ovens have an uneven heat pattern that will burn one side if you leave it still.
- Smaller ovens generally need more frequent rotation than larger ones, simply because the pizza sits closer to the heat source on every side.
- A wetter, higher-hydration dough chars faster than a drier one at the same temperature, so drop your bake time slightly if you’ve moved up to 70% hydration.
- Keep a metal peel or scraper nearby for ash and embers, and never leave a wood-fired oven unattended while it’s at full heat.
- Let the flames die down to embers before baking if you’re getting excessive smoke flavor; a clean bed of coals with a small active flame is usually the target.
Oven-specific guidance matters here. Manufacturer recipes for ovens like Ooni account for how quickly a smaller chamber heats and cools, which changes your rotation timing compared to a full-size wood-fired oven in a garden.
Topping and Assembly Strategy for a 90-Second Bake
Toppings need to survive a bake that’s over before most ovens even finish preheating a frozen pizza. That means every gram of excess moisture on top translates directly into a soggy center, since there’s no time for it to cook off.
Drain fresh mozzarella on paper towels for a few minutes before use, and go lighter on sauce than instinct tells you to. A thin, even layer is enough. Piling on sauce the way you might for a 12-minute bake guarantees a wet middle in a 90-second one.
- Use a burst cherry tomato skillet sauce, cooked down briefly to concentrate flavor and reduce excess liquid, rather than raw canned sauce straight from the jar.
- Assemble toppings fast once the dough is stretched. Every extra minute the shaped dough sits is a minute it can stick to the peel or dry out at the edges.
- Add delicate garnishes like fresh basil or a final drizzle of good olive oil after the bake, not before, since 90 seconds at 900°F will scorch fresh herbs instantly.
- Check the pizza at the halfway point of its cook time. If the top looks done before the base has color, the oven’s hot spot is toward the top of the dome and you should rotate accordingly.
Fewer toppings, more thoughtfully placed, consistently outperform a fully loaded pie in a high-heat oven. This is the opposite instinct from most home cooking, where more usually reads as better.
What to Do When Your Pizza Dough Goes Wrong
Most dough problems trace back to one of four causes, and each has a specific fix rather than a generic “try again” answer.
- Sticky dough. This usually means hydration is running high for your skill level or you’re skipping bench flour. Dust your work surface and hands more generously, and if it’s a recurring problem, drop your next batch to 60% hydration until your technique catches up.
- Tearing when stretching. Cold, under-rested dough is the most common culprit. Let the ball warm up longer at room temperature, gently reshape it into a ball, and give it another 20 to 30 minutes before trying again.
- Burnt base, pale top. Your stone is hotter than your dome, or there’s sugar or oil in the dough accelerating the char. Reposition the pizza higher in the dome away from direct floor contact and shave a few seconds off your next bake.
- Flat, dense rim. This points to underproofing or hydration that’s too low to trap enough gas. Extend your cold ferment by a day, or nudge hydration up by 2% to 3% on your next batch.
Since dough formulation is usually the actual root cause of poor results, not the oven itself, most of these fixes live in your next mix, not your next fire.
How Dough Dorks Supports the Recipes Above
Every formula in this guide points toward the same outcome: a properly hydrated, slow-fermented dough that survives the shock of a 900°F oven. The 48-hour fermented dough balls are created around that balanced 65% hydration profile, made with Italian 00 flour and portioned to weights that suit standard home oven openings.
For readers who want to go deeper on the mechanics, the Neapolitan pizza dough calculator converts baker’s percentages into exact gram weights for any batch size, and the Ooni-specific guidance walks through timing adjustments for smaller oven chambers. Proofing pots, milled 00 flour, and curated toppings round out the ingredient side, so the gap between “recipe on a page” and “pizza on the stone” gets shorter with additional ingredient options.
Does Tap Water Affect Pizza Dough Quality?
Water quality shapes dough more than most home bakers assume. Very hard water, heavy with dissolved minerals like calcium and magnesium, tightens gluten structure and can make dough feel stiffer and slower to ferment. Very soft water, on the other hand, can leave dough slack and sticky because it lacks the minerals that help strengthen gluten bonds.
Chlorine and chloramine, common in municipal tap water, can suppress yeast activity and dull fermentation, since both compounds are designed to kill microorganisms. If your tap water has a strong chlorine smell, letting it sit uncovered for an hour, or simply using filtered water, removes most of that effect.
Mineral content also plays into the small but real acidity of your dough. Water with moderate mineral content, similar to what’s often described as “medium hard,” tends to support steady yeast activity without overwhelming it. This is part of why Naples’ original AVPN water is frequently cited by pizza purists: local water there sits in a mineral range that happens to suit slow-fermented dough well, though replicating it exactly isn’t necessary for good results at home.
If your pizza dough consistently ferments slower or faster than expected despite using the correct yeast percentage and ambient temperature, water is one of the first variables worth testing. Swap in filtered or bottled water for one batch and compare fermentation speed side by side. Most home bakers never need anything more sophisticated than that simple comparison to rule water in or out as the issue.
Adjusting Pizza Dough for Altitude and Humidity
High altitude changes fermentation speed because lower air pressure lets gas bubbles in the dough expand faster and escape more easily. Above roughly 3,000 feet, dough tends to overproof sooner than the clock suggests, so shortening bulk fermentation time and checking the dough visually, rather than trusting the schedule exactly, prevents a collapsed rim.
At altitude, a small increase in salt (staying within the 1.8% to 2.2% range) can also help slow that faster fermentation slightly, giving you a bit more control over timing without changing the flavor much.
Humidity affects flour absorption directly. Flour stored in a humid kitchen or climate absorbs moisture from the air, meaning it needs less added water to hit your target hydration than the same flour would in a dry environment.
Dry climates have the opposite effect: flour pulls moisture out of the dough faster during proofing, which can leave the surface dry and prone to cracking as it stretches. Covering dough balls tightly in their containers, rather than loosely, matters more in dry conditions than humid ones.
None of this requires precision instruments. Watching how your dough behaves over two or three bakes in your specific kitchen, at your specific altitude, teaches you more than any universal formula can.
Should You Use a Poolish or Biga for Pizza Dough?
A poolish is a wet preferment, typically equal parts flour and water by weight with a tiny amount of yeast, left to ferment for several hours before being mixed into the final dough. A biga is its stiffer cousin, using far less water relative to flour, which produces a different flavor and structure once incorporated.

For high-heat pizza ovens, both preferments do the same essential job: they give yeast a head start on breaking down starches and developing flavor compounds before the final dough ever gets mixed. The result is a more complex, slightly tangy flavor and often a more extensible dough that stretches thinner without springing back as aggressively.
A biga produces a drier, stronger dough that some bakers prefer for a chewier crust with a bit more structure at the edge.
Using a preferment adds a step, typically 12 to 16 hours of fermentation before you even start the main dough, so it’s not a shortcut. It’s an extra layer of technique for bakers who’ve already got the basic 24 to 72 hour cold ferment dialed in and want to push flavor complexity further. If you’re still working on consistent stretching and launching, skip the preferment for now and master the straightforward dough first.
Should You Score or Dock Pizza Dough Before Baking?
Docking, poking small holes across the surface of a rolled-out dough with a fork or docking roller, is standard for thin-crust and cracker-style pizzas that need to stay flat. It’s not something Neapolitan-style dough generally needs, since the entire point of that style is a puffy, blistered cornicione, and docking would deliberately deflate the air you’ve worked to trap.
Scoring is different and more relevant to the outdoor oven baker. A light score or a few shallow cuts near the rim, made just before launching, can help direct where the dough expands during its violent 60 to 90 second oven spring. Some bakers score the outer edge lightly to encourage even blistering around the entire circumference rather than one side puffing up more than another.
The technique matters more for very high hydration doughs (70% and above), where the extra water content creates larger, less predictable steam pockets that can occasionally push the crust into an uneven, lopsided shape.
If you notice one section of your rim consistently ballooning while the rest stays flat, a shallow score in that spot on your next bake, made with a sharp paring knife right before the dough hits the peel, can even out the expansion. Treat it as a fine-tuning tool for a specific problem, not a standard step every dough needs.
What Beginners Should Expect From the Learning Curve
Every outdoor oven behaves a little differently, and your first few pizzas are diagnostic tools more than dinner. Expect three or four pies before your timing, rotation, and dough feel start clicking together, and don’t judge your dough recipe off a single bake in an oven you’re still learning to read.
Small-batch experiments teach you faster than big ones. If you’d rather skip the early trial-and-error stretch of the learning curve entirely, the ready-made dough and resources below shortcut a good chunk of it.
— Michael
Skip the Fermentation Setup With Ready-Made Neapolitan Dough
Doughdorks exists for the exact moment this guide is describing: you understand the formula, but you don’t want to run a 48-hour fermentation schedule around your fridge shelf space every time you want pizza on a Friday night. The alternative to building dough from scratch is handcrafted balls already fermented for 48 hours using Italian 00 flour, fresh yeast, and extra virgin olive oil, delivered in insulated packaging so they arrive ready to use.

The product lineup covers the full workflow this article walks through. Pizza dough balls come individually proofed and frozen in free recyclable pots, which solves the exact sticking and handling problem this guide raises about separate containers. Pre-cooked Neapolitan bases give you an even faster route to the table on nights when full dough handling isn’t realistic, and the curated pizza toppings range, from cheeses to charcuterie, means sourcing quality ingredients doesn’t become its own separate project.
Handling a purchased dough ball follows the same warming logic covered earlier: thaw it in the fridge overnight, then let it sit at room temperature until it reaches roughly 60°F (15.5°C) before stretching, giving it one final short proof on the counter so it relaxes fully before it meets the peel. Browse the full dough and pizza range to see current stock and get your next pizza night started without a 48-hour countdown.
Sources
- Pizza dough for an outdoor pizza oven recipe - Serious Eats
- Pizza Napoletana specification (AVPN / EU document)
- Ooni Neapolitan-style pizza dough (Ooni UK)
FAQ
What Is a Reliable Pizza Dough Recipe for a Pizza Oven?
This matches the Ooni Neapolitan-style formula and bakes well at 750°F to 900°F in roughly 60 to 90 seconds.
Can You Use Store-Bought Pizza Dough in a Pizza Oven?
Yes, but most supermarket dough is formulated for lower-temperature indoor ovens and often contains oil or sugar that can char quickly at 800°F and above. A dough specifically made for high-heat baking, like Doughdorks’ 48-hour fermented dough balls, performs far more predictably.
What Is the Best Base for a Pizza Oven?
Pre-cooked Neapolitan bases are a solid shortcut when you want that same result without full dough handling.
What Dough Should You Use for an Ooni Pizza Oven?
Ooni’s own recipe recommends 65% hydration with a long, cold proof, which suits the smaller chamber and fast rotation these ovens need. Smaller dough balls, generally 225g to 300g, fit the opening better and cook more evenly than larger ones.
How Long Should Pizza Dough Rest Before Using It in a Pizza Oven?
Cold ferment for 24 to 72 hours for the best flavor, then let the dough ball warm up at room temperature for 1 to 2 hours before stretching. Cold dough tears and resists shaping, so that warm-up step matters as much as the fermentation itself.
Recommended
- Neapolitan Pizza Dough: Authentic Recipe for Home Ovens
- 48hr Neapolitan Pizza Dough By Weight
- Weigh, Autolyse, Fold, Chill: Pizza Dough Hydration for Home Bakers
- Neapolitan Pizza Dough Calculator Explained
READY-MADE • FROZEN • UK DELIVERY
Skip the mixing. Keep proper dough in your freezer.
48-hour fermented, individually proofed in their own pot and delivered frozen across the UK. Defrost, stretch, top and bake.
-
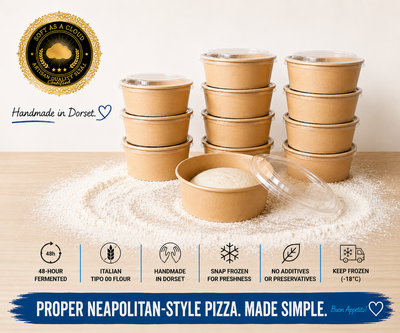 48-Hour Neapolitan-Style Pizza Dough Balls – Box of 12
£22.88
-
 48-Hour Neapolitan-Style Pizza Dough Balls – Box of 20
£32.30
-
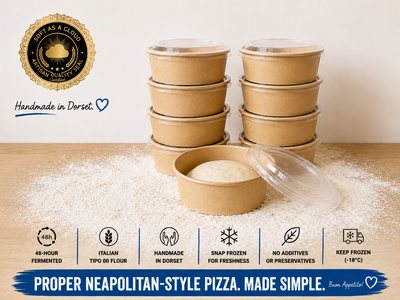 48-Hour Neapolitan-Style Pizza Dough Balls – Box of 8
£18
Handmade in Dorset • Free UK delivery over £50 • Free proofing pot with every dough ball