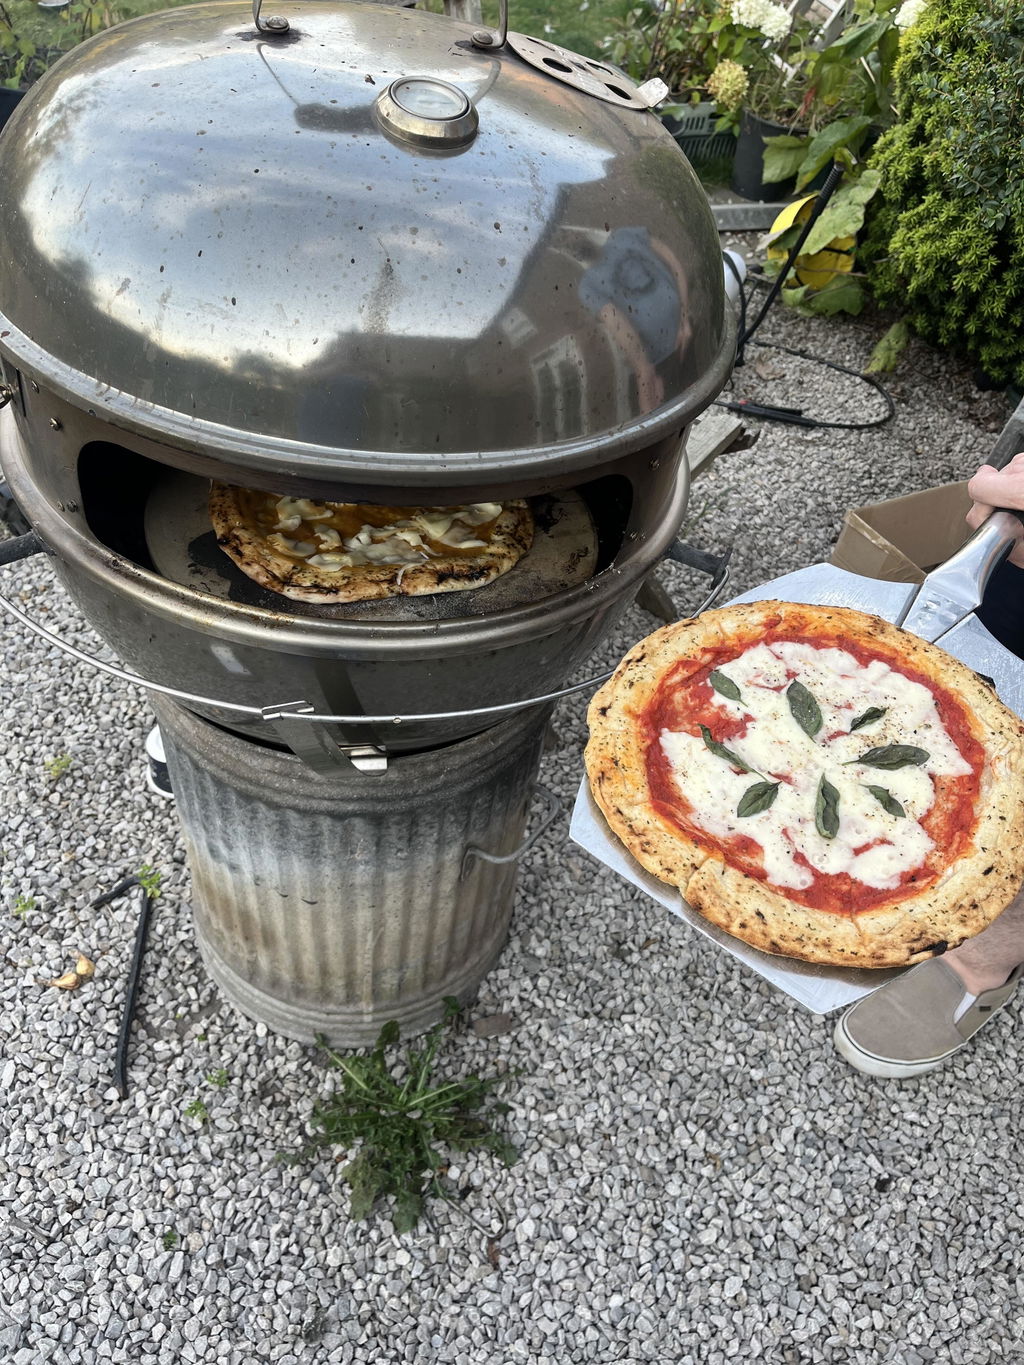
20 to 30 Minute Rescue for Overproofed Pizza Dough in UK Kitchens
Kitchen-tested, UK-friendly steps to cool, degas, reshape and chill overproofed pizza dough. Try a 20 to 30 minute rescue or repurpose it into focaccia or...
Most overproofed pizza dough is still salvageable if the gluten hasn’t broken down chemically. Do a poke test and get the dough cold immediately. If it holds together and springs back slowly, degas it, re-ball it, and give it a short chill before baking hot. If it smells sharply of nail-polish remover or tears the moment you lift it, skip the pizza and turn it into focaccia or flatbread instead.
TL;DR:
- Overproofed dough can still be rescued if the gluten structure remains intact and it does not have a strong solvent smell; quick cooling and gentle handling are essential.
- The poke test is the most reliable indicator, where a dough that fails to spring back or leaves a permanent dent is overproofed, especially if accompanied by a sharp, boozy odor.
- Moisture content, yeast amount, and temperature during proofing significantly affect overproofing, which can be managed by precise timing, proper fridge placement, and accurate yeast dosing.
- Rescuing involves cool-down, gentle degassing, reshaping, and a short rest in the fridge before gentle stretching and baking at high heat, though volume may decrease roughly 20 percent.
- Overproofed dough not suitable for pizza can be ideal for focaccia, flatbreads, or pan breads, which tolerate slack and uneven bubbles better than traditional pizza crusts.
Table of Contents
- How Do You Know If Pizza Dough Is Overproofed?
- How to Fix Overproofed Dough Step by Step
- Creative Ways to Use Overproofed Dough
- How Can You Prevent Overproofing Next Time?
- When Is Overproofed Dough Beyond Saving?
- Why Trust This Advice on Overproofed Dough
- Small Habits Beat Complicated Fixes
- Skip the Timing Risk With Ready-Made Dough
- Sources
- FAQ
How Do You Know If Pizza Dough Is Overproofed?
The poke test tells you almost everything you need to know in about ten seconds. Press a floured fingertip into the dough about half an inch deep, then pull it away and watch what happens. Dough that’s properly proofed springs back slowly, leaving a shallow dimple that fills in over several seconds. Dough that springs back instantly hasn’t proofed enough. Dough that doesn’t spring back at all, or that leaves a crater that just sits there, has gone too far.
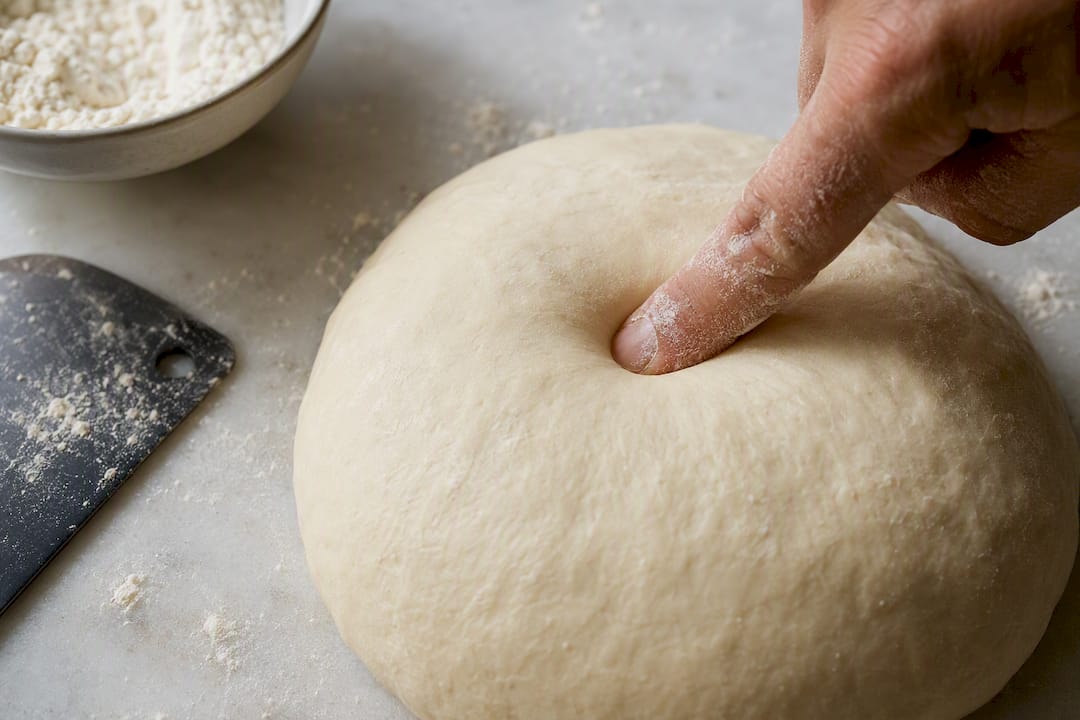
The Dough Formula recommends catching this window early. Their poke-test timeline suggests you can usually spot the warning signs 30 to 60 minutes before a dough crosses into truly unsalvageable territory, which is exactly the window where a quick rescue still works.
Visual cues back up the poke test. Look for these signs on your dough ball or in the tub:
- A dome that’s flattened or slightly sunken instead of rounded
- Large, irregular bubbles pushing up under the surface
- Small craters or pockmarks where bubbles have already popped
- A surface that looks shiny, wet, or slightly slack compared to a tight, springy ball
- Dough that’s spread out wider in the container than it started
Smell is the tiebreaker when the visual signs are ambiguous. Properly fermented dough smells yeasty, faintly sweet, maybe a little tangy if it’s a longer cold ferment. Overproofed dough smells different: sharp, boozy, almost like nail-polish remover. That’s ethanol and acetic acid building up as the yeast runs out of sugar to eat and starts producing off-flavors as byproducts.
Pro Tip: Keep a kitchen timer running the moment you pull dough out for its final proof. Most home bakers lose track of time because they’re doing five other things, and twenty “extra” minutes on a warm counter can be the difference between a great crust and a rescue mission.
Context matters as much as the dough itself. A ball left on a warm kitchen counter for even 90 minutes past its target time proofs faster than the same dough in a cool pantry. Yeast percentage plays a role too: a dough mixed with 2% fresh yeast for a same-day bake behaves nothing like one built with 0.1% for a 72-hour cold ferment. And fridges aren’t uniformly cold. Door shelves and the top rack near the seal often run several degrees warmer than the back, which means dough you think is “resting safely” in the fridge might still be actively fermenting.
How to Fix Overproofed Dough Step by Step
The core idea behind rescuing overproofed dough is what Modernist Cuisine calls “dough CPR”: degassing, reshaping, and giving the dough a short second proof to rebuild some structure. It’s not a guaranteed fix, but it works often enough that you should always try it before writing the dough off.
Step one: cool it down, fast. Temperature is the lever you control. If the dough is still on the counter, move it to the fridge immediately, even if you’re not ready to bake for another hour. Slowing the yeast buys you time to work without the dough continuing to overproof while you’re fussing with it.
Step two: lift and degas gently. Once the dough is cool to the touch, lift it out of its container with a bench scraper or your hands, trying not to tear the surface. Press it down gently to release the trapped gas. You’re not aiming to punch the life out of it. You’re aiming to deflate the big pockets that would otherwise turn into blowouts or hollow patches in the crust.
Step three: fold the edges into the center. Take the outer edges of the dough and fold them toward the middle, rotating the ball as you go. This rebuilds a bit of the surface tension that overproofing destroys, giving the gluten network something to grip again.
Step four: tighten the skin. Cup your hands around the dough and drag it toward you against the counter a few times, the way you’d shape a fresh ball. You’re trying to create a taut outer “skin,” which traps whatever gas-holding capacity is left in the dough.
Step five: give it a short, cold rest. Twenty to thirty minutes in the fridge is usually enough. This is the step most home bakers skip because they’re in a hurry, and it’s the one that makes the biggest difference in the final crust. Modernist Cuisine and other rescue-focused sources agree that a brief rest after reshaping lets the gluten relax and rebuild a bit of strength before you stretch it again.
Step six: stretch gently and bake hot. Handle the dough with open palms rather than aggressive stretching or tossing. Overproofed gluten is weaker than it should be, so rough handling tears it. Use a shallow score or two if the surface looks tight and prone to blistering unevenly. Get your oven and stone or steel as hot as they’ll go, since a fast, hard bake sets the crust before the weakened structure has a chance to collapse further.
Set your expectations honestly. America’s Test Kitchen found that punching down and reproofing overproofed dough produced acceptable results, but the rescued dough baked up roughly 20% smaller in volume than dough that had never overproofed in the first place. You’re not getting back to perfect. You’re getting to good.
A few handling notes depending on your dough style:
- High-hydration doughs (70% water or more) are slacker to begin with, so they tear more easily during the rescue. Handle them with wet hands instead of flour to avoid dragging the surface.
- Sourdough overproofs on a different clock than commercial yeast, and its gluten tends to be more fragile once it’s gone too far. Shorten the post-rescue rest to 15 minutes rather than 30, since sourdough doesn’t rebuild strength as reliably.
- Multi-ball batches proofing at different rates should be pulled and rescued one at a time. Don’t wait for the slowest ball to catch up while the fastest one keeps sliding past the point of no return.
King Arthur Baking notes that pan height and reshaping technique both affect how much oven spring you get back after a rescue, which is worth keeping in mind if your rescued dough still looks flatter than you’d like going into the oven.
Creative Ways to Use Overproofed Dough
Not every overproofed ball needs to become a pizza. Some of the best uses for dough that’s gone a little too far lean into its slack, airy texture instead of fighting it.
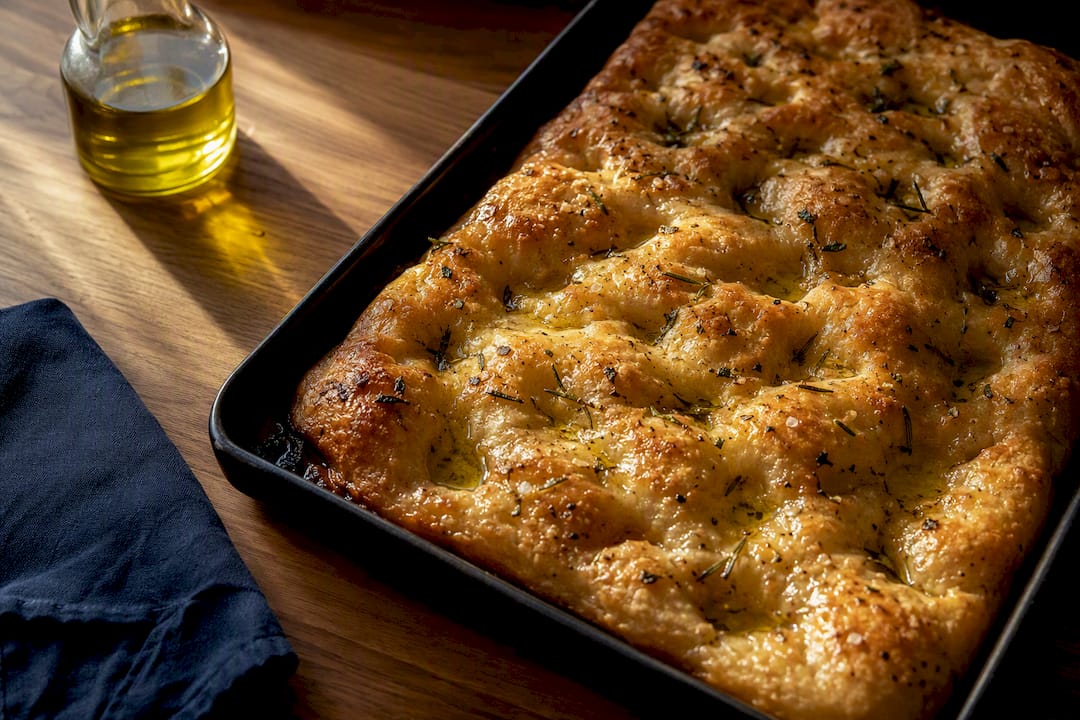
Focaccia is the obvious move, and it’s forgiving in exactly the ways pizza isn’t. Press the dough into an oiled sheet pan instead of trying to stretch a round. Dimple it all over with your fingertips, drizzle with olive oil, add flaky salt and whatever herbs you like, and bake at around 450°F (230°C) for 20 to 25 minutes. The big, uneven bubbles that would ruin a pizza crust turn into the craggy, oil-pooled texture people pay good money for at a bakery.
Pizza sandwiches, sometimes called foldies, work well with slacker dough because you’re not relying on it holding a thin, even stretch. Roll or press the dough flatter than usual, load one half with cheese and toppings, fold it over like a calzone, seal the edge, and either bake it hot on a stone or pan-fry it in a little oil for a crispier result.
Pan pizza is a smart fallback when the dough is too slack to stretch into a round without tearing. Press it into an oiled cast-iron skillet or sheet pan, let the edges climb the sides a little, and bake it low and slow compared to a Neapolitan pie, around 425°F (220°C) for 15 to 18 minutes. The pan gives structure the dough itself no longer has.
Flatbreads and crackers solve the problem from the other direction: stretch the dough as thin as it’ll go, prick it a few times, and either par-bake it briefly for a soft flatbread or take it all the way for a crisp cracker. Thin dough hides overproofing better than thick dough because there’s less crumb structure to fall apart.
If you’ve rescued more dough than you need tonight, portion it, oil each piece lightly, and freeze it flat in a bag. Thaw it in the fridge overnight and give it a short room-temperature rest before shaping. Rescued dough doesn’t freeze quite as well as fresh dough, so plan to use it within a month or two rather than treating it like a long-term stash.
How Can You Prevent Overproofing Next Time?
Most overproofing problems trace back to one of three things: too much yeast, a fridge that isn’t as cold as you think, or a lack of check-ins during the final proof. Fix those three and you’ll rarely be in rescue mode again.
Yeast percentage matters more than most home bakers realize. A dough built for a same-day bake might use 1.5% to 2% fresh yeast against flour weight. Stretch that same amount over a 48 to 72 hour cold ferment and it will blow past ready long before you planned to bake. For long cold ferments, dropping down to somewhere in the 0.1% to 0.3% range gives you a much wider window to work with. Dough Dorks’ guide on cold-fermented pizza dough walks through yeast dosing for 48-hour ferments if you want exact ratios to start from.
Desired dough temperature (DDT) planning sounds technical but it’s really just accounting for the fact that a small shift in starting temperature changes fermentation speed a lot. Mixing dough at 78°F instead of 72°F can meaningfully shorten how long it takes to hit peak proof, especially over a multi-day schedule. If you’re not already factoring in your flour, water, and room temperature when you mix, that’s the first habit to add.
Fridge placement is an underrated variable. Fridge door shelves and warm pockets near the seal commonly run 7 to 8°C, warm enough for yeast to keep working slowly instead of nearly stopping. Store proofing dough on the lowest, rearmost shelf, away from the door, where the temperature swings the least.
A few habit changes cover the rest:
- Set a repeating timer rather than trusting memory once dough goes into its final proof.
- Poke-test every 15 to 30 minutes during the last stretch of proofing, especially in a warm kitchen.
- Stagger multi-pizza nights by pulling dough balls from the fridge at different times so they don’t all hit peak proof while you’re still cooking the first pie.
- Write your mix time and target bake time on the container lid. It sounds trivial, but it’s the single easiest fix for “I forgot how long this has been out.”
Our guide on how to proof pizza dough properly breaks down proofing timelines and readiness signs in more detail if you want a fuller reference to work from.
When Is Overproofed Dough Beyond Saving?
Some signs mean the dough is done, full stop. A strong solvent or acetone smell signals that protease enzymes have been breaking down the gluten structure for a while, not just that fermentation ran long. Once that’s happened, folding and reshaping won’t rebuild strength that’s chemically gone, because there’s less intact protein network left to work with.
Check by lifting a section of the dough gently. If it tears immediately instead of stretching, or separates into loose, gloppy pieces rather than holding together as one mass, that’s your answer. A poke test that leaves a permanent, unmoving dent is another red flag. If you bake it anyway, expect a flat, pale crust with almost no rim and a dense, gummy crumb, since there’s no gluten left to trap gas or brown properly.
At that point, repurpose it into focaccia or a thin, well-oiled flatbread instead. The texture problems that ruin a pizza crust matter far less in something that’s not trying to hold a tall, airy structure.
Why Trust This Advice on Overproofed Dough
Dough Dorks builds its dough balls around a slow, 48-hour fermentation process using Italian 00 flour and fresh yeast, so getting fermentation timing right isn’t an academic exercise for us. It’s the whole product.
The rescue steps in this guide line up with what Modernist Cuisine, King Arthur Baking, and America’s Test Kitchen all independently recommend: degas, reshape, rest briefly, bake hot. For more on handling dough gently once it’s rescued, our guide on stretching pizza dough without tearing covers the technique in depth.
Small Habits Beat Complicated Fixes
Most overproofing disasters aren’t caused by bad technique. They’re caused by distraction. You get pulled away for twenty minutes, the dough keeps working the whole time, and suddenly you’re doing damage control instead of making dinner.
The three habits that actually move the needle are boring: a timer you can’t ignore, a poke test you actually run instead of eyeballing it, and dough stored on the coldest fridge shelf instead of wherever there’s room. None of that requires new equipment or a deeper understanding of fermentation chemistry.
Rescue technique is worth learning too, because it works more often than people expect. But the bakers who never need it are the ones who caught the problem 20 minutes earlier, not the ones who got better at fixing it after the fact.
— Michael
Skip the Timing Risk With Ready-Made Dough
If proofing windows and fridge temperatures feel like one more thing to manage on a busy night, Ready-made dough that’s already been through a 48-hour fermentation before it reaches your kitchen offers a straightforward workaround.

Each pizza dough ball is proofed and frozen at the right point, so there’s no poke test to run and no timer to babysit. Thaw it in the fridge, let it come up to room temperature for a short rest, then stretch and bake hot, the same technique this guide covers for rescued dough, minus the rescue. If you’d rather skip dough handling altogether, the pre-cooked pizza bases and pizza toppings selection covers the rest of the pie. Head to Dough Dorks to browse the current range and get pizza night on the table without watching the clock.
Sources
For readers who want to dig into the chemistry and technique behind dough rescue in more detail, these are the sources this guide draws on:
- How to Rescue Overproofed Dough - Modernist Cuisine
- Saving Overproofed Dough | America’s Test Kitchen
- How to save your loaf | King Arthur Baking
- Thepizzaplanet
- Reading An Overproofed Dough Before It’s Too Late | The Dough Formula
FAQ
How Can I Fix Overproofed Pizza Dough?
Cool the dough right away, then gently degas it, fold the edges into the center, and reshape it into a tight ball. Give it a short 20 to 30 minute cold rest before stretching it gently and baking it in the hottest oven you have.
Can I Still Make Pizza With Overproofed Dough?
Yes, in most cases, as long as the dough hasn’t torn or developed a strong solvent smell. Expect a slightly flatter crust than usual, since rescued dough often bakes up around 20% smaller in volume than dough that never overproofed.
What Happens if I Let My Pizza Dough Rise Too Long?
The dough loses structure as gas overinflates the gluten network, then eventually deflates on its own, leaving a flat, slack ball. Left long enough, protease activity starts breaking down the gluten itself, producing the sharp, alcohol-like smell that signals real damage rather than just overfermentation.
How Do I Know if I Overproofed My Pizza Dough?
Run a poke test: press a finger in about half an inch, and if the dough doesn’t spring back or leaves a permanent dent, it’s overproofed. Look for a flattened dome, large surface bubbles, and check for a strong boozy smell, which The Dough Formula notes usually shows up 30 to 60 minutes before the dough becomes unsalvageable.
Recommended
- 48 Hour Cold Fermented Pizza Dough for UK Home Cooks, Exact Formula
- How to Fix an Undercooked Pizza Base: Rescue It Now
- How to Proof Pizza Dough Properly
- Keep Oven Spring When Hand Stretching Pizza Dough for Home Cooks
READY-MADE • FROZEN • UK DELIVERY
Skip the mixing. Keep proper dough in your freezer.
48-hour fermented, individually proofed in their own pot and delivered frozen across the UK. Defrost, stretch, top and bake.
-
 48-Hour Neapolitan-Style Pizza Dough Balls – Box of 12
£22.88
-
 48-Hour Neapolitan-Style Pizza Dough Balls – Box of 20
£32.30
-
 48-Hour Neapolitan-Style Pizza Dough Balls – Box of 8
£18
Handmade in Dorset • Free UK delivery over £50 • Free proofing pot with every dough ball