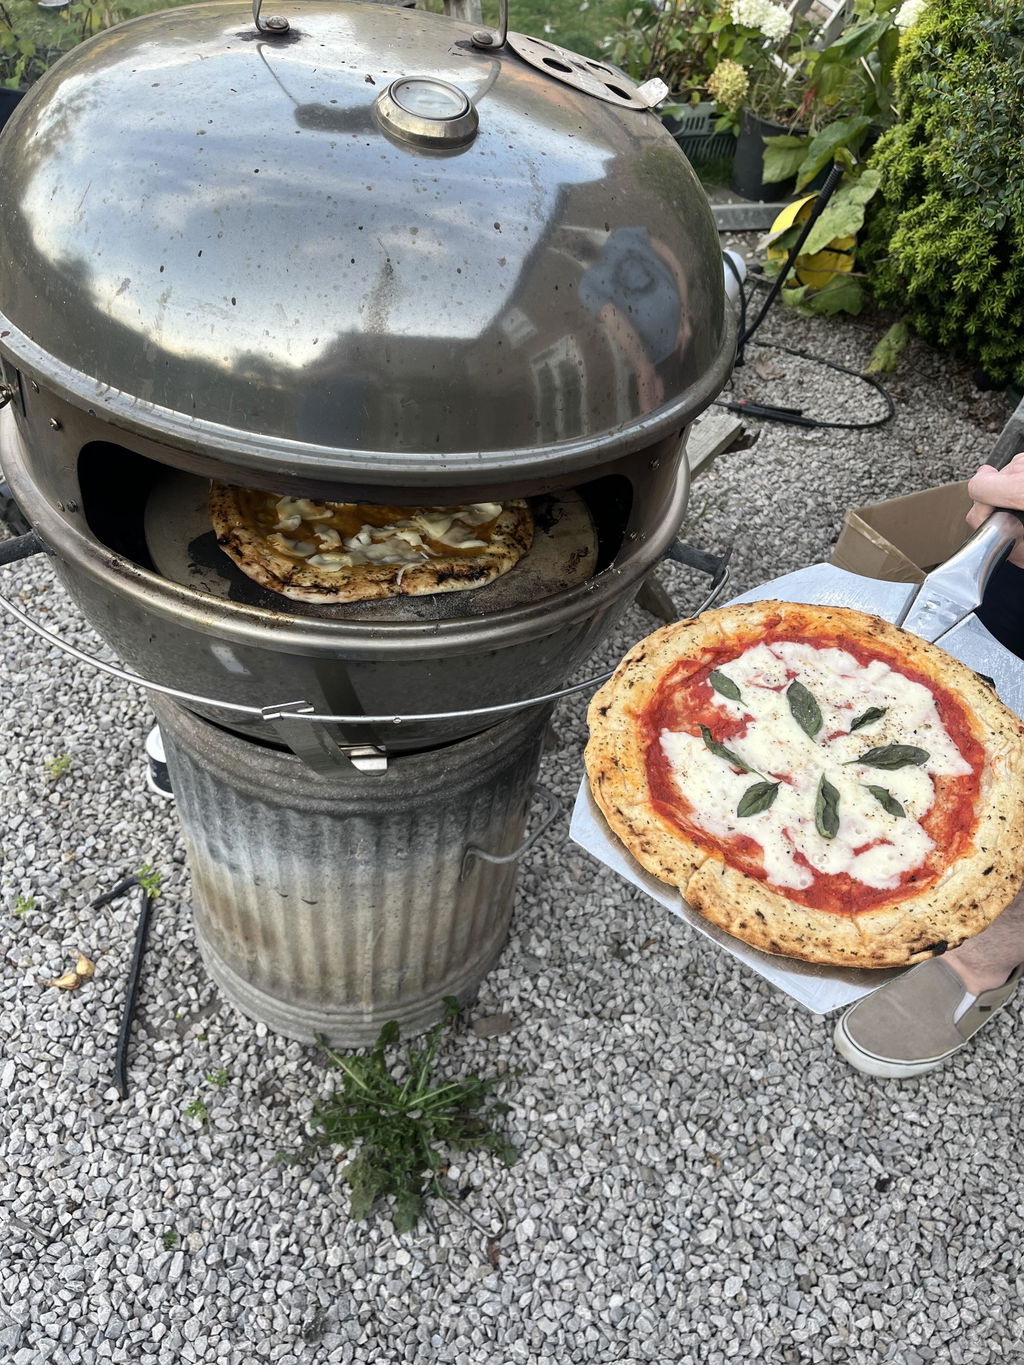
The Best At-Home Pizzas Start With Real Dough, Not a Frozen Box
Discover how to make the best at-home pizzas using authentic dough. Unlock delicious, restaurant-quality flavors with simple techniques.
The fastest route to restaurant-quality Neapolitan pizza in your own kitchen is handcrafted, 48-hour fermented dough balls or a curated pizza kit, paired with the hottest baking surface your oven can manage. Skip the supermarket dough and you skip most of the disappointment. Get three things right and everything else falls into place:
- Flour and fermentation: Italian 00 flour and a cold ferment of at least 24 hours, ideally 48, build the flavor and easy digestibility that separates a proper Neapolitan base from a gym-sock crust.
- Heat: you need a baking surface that hits at least 250°C, whether that’s a steel, a stone, or a countertop pizza oven.
- Restraint on toppings: less sauce and cheese means better blistering and a crust that actually holds its shape.
Doughdorks sells UK-delivered dough balls, tester packs and pre-cooked bases built around exactly this workflow, which is where most of this guide points you.
Key Takeaways
The fastest way to get authentic Neapolitan-style pizza at home is 48-hour fermented dough balls made with 00 flour, baked on a very hot preheated surface with minimal toppings.
| Point | Details |
|---|---|
| Choose 00 flour and cold fermentation | 24 to 48 hours of cold proofing builds flavor and a lighter, more digestible crust than same-day dough. |
| Follow AVPN portion guidance | Keep dough balls between 200 and 280 grams and never let salt sit directly against yeast during mixing. |
| Preheat your stone or steel fully | Give it 45 to 60 minutes at your oven’s maximum temperature before the pizza goes in. |
| Go light on toppings | Around 50ml of sauce and 100g of cheese per pizza lets the crust blister instead of turning soggy. |
| Match the product to your skill level | Doughdorks offers 48hr dough by weight for confident bakers, tester packs for first-timers, and pre-cooked bases for speed. |
Table of Contents
- What Makes Pizza Genuinely Neapolitan-Style
- Fresh Dough, Kits, or Pre-Cooked Bases: Which Fits Your Kitchen?
- Getting Neapolitan Results From a Standard UK Oven
- Topping Order and Quantities That Actually Work
- Common Mistakes That Ruin Home Pizza Night
- Fixing Dough and Baking Problems on the Fly
- Choosing Sauce and Cheese for an Authentic Result
- Getting a Crisp Crust and Even Cheese Melt Every Time
- Gluten-Free and Vegan Neapolitan-Style Options
- What Most Guides Get Wrong About Home Pizza Night
- Building Your Shopping List for Pizza Night
- Frequently Asked Questions
- Sources
What Makes Pizza Genuinely Neapolitan-Style
Neapolitan pizza isn’t defined by toppings. It’s defined by flour, water ratio, fermentation time, and a punishing amount of heat for a very short time. Get the technique wrong and even San Marzano tomatoes and buffalo mozzarella won’t save the pizza.
00 flour is the non-negotiable starting point. It’s milled far finer than standard bread flour, which changes how it absorbs water and how the gluten network develops. That finer grind gives you a dough that stretches thin without tearing and still holds gas bubbles well enough to puff up in the oven. Standard UK plain flour can work in a pinch, but it produces a denser, less elastic dough that’s harder to shape by hand. Doughdorks breaks down exactly why 00 flour behaves differently from everyday flour if you want the fuller picture.
The Associazione Verace Pizza Napoletana sets the technical benchmark most serious home bakers follow, and one detail trips up almost everyone the first time:
- Keep salt and yeast apart during mixing. AVPN warns against letting salt sit in direct contact with yeast for more than five minutes, because salt kills yeast activity on contact.
- Use fresh yeast in small quantities and let time, not extra yeast, do the flavor work.
- Portion dough balls at 200 to 280 grams each. That’s roughly a 10 to 12 inch pizza once shaped, so a batch of six balls comfortably feeds six people with one pizza apiece.
Here’s the part that surprises new bakers: a 48-hour cold ferment isn’t a gimmick. That extended proofing time in the fridge lets enzymes slowly break down starches into sugars, which is why properly fermented dough tastes noticeably sweeter and chars more evenly than same-day dough, and why it tends to sit lighter in your stomach too.
Michele Pascarella, whose technique guides feature in The Independent’s coverage of Neapolitan pizza, pushes a “less is more” rule on toppings. Overload the base and the extra moisture stops the crust from blistering properly, no matter how good your dough is.
Fresh Dough, Kits, or Pre-Cooked Bases: Which Fits Your Kitchen?
Your choice here should come down to three questions: how much time do you have, how confident are you shaping dough by hand, and what can your oven actually do? Answer those honestly and the right product picks itself.
Fresh 48-hour dough balls give you the most authentic result and the most control, but you’re shaping the dough yourself, which takes a bit of practice. Pizza kits bundle dough with sauce, cheese and sometimes flour for dusting, which is ideal if you want a guided first attempt without hunting down five separate ingredients. Pre-cooked Neapolitan bases skip the shaping step entirely. You’re topping and finishing rather than fermenting and stretching, which suits a weeknight far better than a leisurely Sunday project.
Storage matters more than most buying guides admit. Fresh dough balls need refrigeration and a fairly short use window; freezing works but changes the texture slightly once thawed. UK delivery for chilled dough and pre-cooked goods typically arrives via next-day cold-chain courier, and UK pizza kit retailers generally recommend using fresh dough within a few days of delivery rather than letting it sit.
- First-time buyer: start with a tester pack of four dough balls before committing to a bigger order.
- Confident home baker: go straight for 48hr Neapolitan dough by weight and portion it yourself.
- Short on time or oven power: pre-cooked Neapolitan bases cut shaping and most of the guesswork out entirely.
Pro Tip: If you’re not sure whether your oven can hit Neapolitan-level heat, a pre-cooked base is the safer first purchase. It’s already proven the crust structure, so you’re only responsible for the topping and a shorter reheat.
Getting Neapolitan Results From a Standard UK Oven
You don’t need a wood-fired oven parked in the garden to get a properly blistered crust. You need heat concentrated where the dough touches the surface, and enough of it fast enough that the top cooks before the bottom burns.
- Put a baking stone or steel on the highest rack position your oven allows, then preheat for a full 45 to 60 minutes at your oven’s maximum setting, usually somewhere around 250°C for most domestic UK ovens.
- Slide the shaped pizza directly onto the hot surface using a floured peel or the back of a flat baking tray.
- Bake for roughly 6 to 9 minutes in a domestic oven, rotating the pizza once halfway through so it colors evenly rather than scorching on one side.
- Watch the cornicione, the puffed outer rim, rather than the topping. Once it’s blistered and deep golden with dark leopard spots, it’s done.
A preheated steel gives a slightly crisper bottom crust than stone in most domestic ovens, mainly because steel conducts heat faster than stone at the same temperature. If your oven caps out lower than you’d like, that steel advantage matters more, not less.
Countertop pizza ovens change the equation entirely. Many hit 400°C or higher within minutes, cooking a pizza in 90 seconds the way a genuine Neapolitan wood oven does. That’s a real step up from any domestic oven, but it’s also an added appliance and expense that not every kitchen has room for.
If you’re working with a pre-cooked base, the job is simpler: top it cold, then bake at your oven’s highest setting for 5 to 8 minutes until the cheese melts and the edges char slightly.
A few practical notes for English kitchens: crank your extractor fan before you preheat, since a 250°C oven door radiates serious heat into a small kitchen. Keep tea towels and oven gloves well clear of the open door, and never leave a hot stone or steel unattended near small children.
Topping Order and Quantities That Actually Work
Sauce first, always, and less than you think. A light layer, roughly 50ml for a 10 to 12 inch base, spread almost to the edge but leaving the rim bare. Pile on more and you’ll get a soggy center that never firms up.
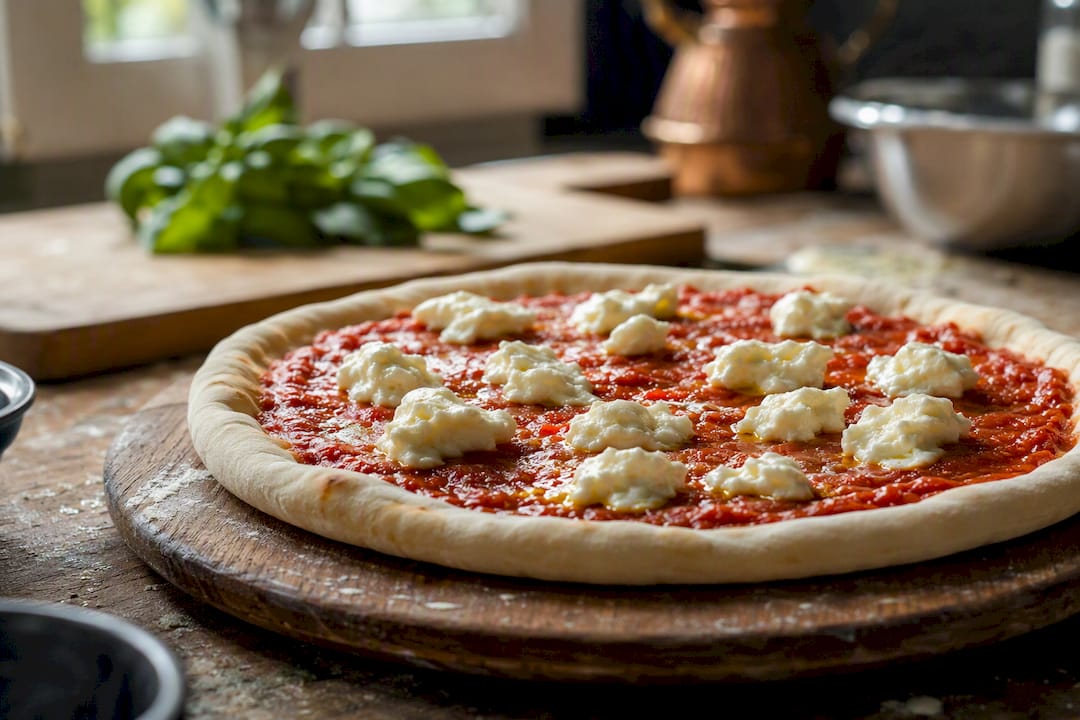
Fior di latte or fresh mozzarella goes on next, torn into small pieces or thin slices rather than one thick round. Spreading it out means it melts evenly instead of pooling into one wet patch in the middle.
Moisture-heavy toppings need special handling. Fresh basil can go on before baking and survive fine, but prosciutto, rocket and other delicate additions are better added after the pizza comes out of the oven. Bake them and they either burn or turn leathery.
- Classic Margherita: tomato, fior di latte, a drizzle of extra virgin olive oil, fresh basil after baking.
- Marinara variation: tomato, garlic, oregano, olive oil, no cheese at all, which is the older and arguably more traditional style.
- Prosciutto and rocket: bake the pizza plain with tomato and mozzarella, then add prosciutto and rocket the moment it comes out of the oven.
Finish every pizza with a light drizzle of good olive oil and a pinch of flaky salt right before serving. That last touch of seasoning, added off the heat, is what makes a home pizza taste finished rather than just cooked. Doughdorks’ notes on authentic topping choices cover more combinations if you want to branch out from Margherita.
Pro Tip: Weigh your mozzarella instead of eyeballing it. Around 100g per pizza is the sweet spot, enough to melt into pools without drowning the crust.
Common Mistakes That Ruin Home Pizza Night
Overproofing and overloading are the two most common failures, and they’re both easy to fix once you know to watch for them.
Too much topping is the single biggest culprit behind a soggy center. If your sauce, cheese and extras add up to a wet layer more than a few millimeters thick, the base simply can’t cook through before the toppings burn.
Rolling the dough with a rolling pin instead of stretching it by hand is the second common error. A rolling pin knocks all the air out of the dough, flattening the bubbles that would otherwise puff into that light, airy cornicione. Push and stretch from the center outward with your fingertips instead.
Skipping the preheat, or cutting it short, leaves your stone or steel at half the temperature it needs. A cold stone doesn’t sear the base, it just steams it, and you end up with a pale, chewy bottom no matter how good your dough was.
Using cold dough straight from the fridge is another quiet failure. Cold dough tears and springs back instead of stretching, because the gluten hasn’t relaxed. Pull it out and let it sit at room temperature for 45 minutes to an hour before shaping.
Finally, overworking the dough during shaping degasses it entirely. Handle it gently, shape quickly, and get it into the oven as soon as it’s stretched. Every extra minute of fussing is a minute the dough loses its lift.
Fixing Dough and Baking Problems on the Fly
Most home pizza failures trace back to one of a handful of fixable issues. Here’s how to diagnose them mid-bake or before your next attempt.
Dough tears when stretching: it’s either too cold or under-proofed. Let it warm up longer at room temperature, and if it still tears, extend your next batch’s fermentation time.
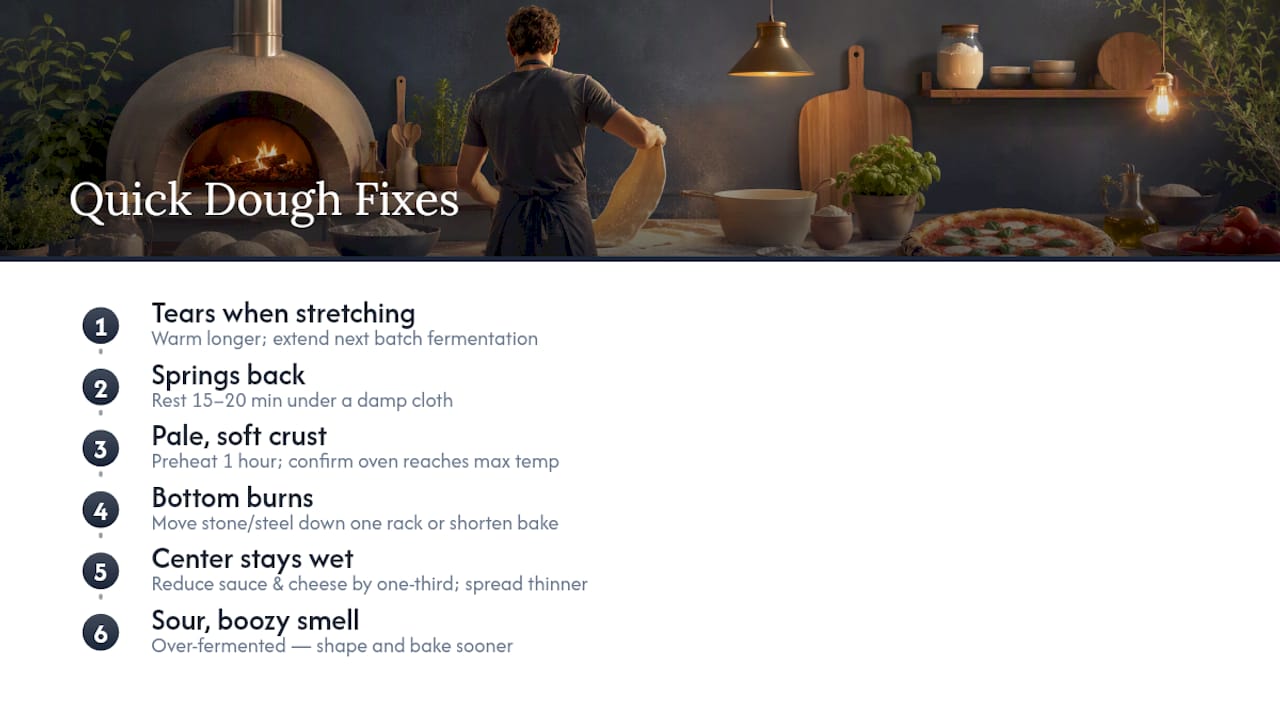
Dough springs back instead of holding its shape: the gluten hasn’t relaxed enough. Rest it for another 15 to 20 minutes under a damp cloth, then try again.
Crust is pale and soft, not blistered: your oven or surface wasn’t hot enough. Extend the preheat to a full hour and confirm your oven is actually reaching its stated maximum, since many domestic ovens run cooler than the dial suggests.
Bottom burns before the top cooks: the surface is too close to the top element, or too hot for too long a bake. Move the stone or steel down one rack position, or shorten the bake slightly and finish under a grill for the last minute.
Center stays wet and undercooked: you’ve used too much sauce or cheese. Cut both back by a third on your next pizza and spread them thinner.
Dough smells sour or overly boozy: it’s over-fermented. That happens when dough spends too long at room temperature after coming out of the fridge, so shape and bake it sooner next time.
Choosing Sauce and Cheese for an Authentic Result
San Marzano-style tomatoes, crushed by hand rather than blended smooth, give you the balance of sweetness and acidity that defines a proper Neapolitan sauce. Skip pre-seasoned pizza sauces loaded with sugar and dried herbs. A pinch of salt and nothing else is often all a good tomato needs.
Fior di latte is the standard cheese for most home bakes, a fresh cow’s milk mozzarella that melts smoothly without releasing too much water. Buffalo mozzarella has a richer, tangier flavor but holds more moisture, so pat it dry before use or your center will run wet.
For variety beyond classic Margherita, a light pesto works well as a base sauce alternative, though it’s best added partway through or after baking since basil oil scorches at high heat. Doughdorks’ pesto Neapolitan pizza is built around that exact timing.
Avoid pre-shredded mozzarella blends sold for standard pizza. They’re coated in anti-caking agents that stop proper melting and leave a rubbery texture instead of the stretchy pull you want.
Getting a Crisp Crust and Even Cheese Melt Every Time
Crispness comes almost entirely from surface temperature and moisture control, not from any trick ingredient. A properly preheated stone or steel does most of the work before the cheese even matters.
Pat any fresh mozzarella dry with a paper towel before it goes on the pizza. Excess whey is the number one cause of a crust that crisps on the outside but stays gummy underneath.
Bake at the highest temperature your oven allows rather than a moderate “safe” setting. A shorter, hotter bake sets the crust before moisture has time to soak in, while a longer bake at lower heat does the opposite.
If your cheese is melting unevenly, browning in spots while staying pale elsewhere, it usually means your oven has hot spots. Rotate the pizza once at the halfway point rather than leaving it stationary for the full bake.
Gluten-Free and Vegan Neapolitan-Style Options
Gluten-free Neapolitan-style dough is genuinely harder to get right, because gluten is what gives regular dough its stretch and chew. Blended gluten-free flours with xanthan gum can approximate the texture, but expect a slightly denser, more delicate base that tears more easily when shaping. Pre-cooked gluten-free bases tend to give more consistent results than shaping raw gluten-free dough at home, since the structure is already set before you top it.
Vegan Neapolitan pizza is far more straightforward, since the dough itself, flour, water, salt and yeast, is naturally free of animal products already. The real substitution happens at the topping stage: plant-based mozzarella alternatives have improved enough to melt reasonably well, though they rarely stretch quite like fior di latte. A vegan marinara-style pizza, tomato, garlic, oregano and olive oil with no cheese at all, sidesteps the substitution question entirely and happens to be one of the oldest styles of Neapolitan pizza anyway.
What Most Guides Get Wrong About Home Pizza Night
Most advice on home pizza obsesses over equipment, a $400 countertop oven here, a $60 stone there, when the actual gap between mediocre and excellent home pizza sits almost entirely in the dough itself. A brilliant oven fed bad dough still makes bad pizza. A modest domestic oven fed properly fermented 48-hour dough gets remarkably close to pizzeria quality.
The conventional wisdom also underrates how much damage over-topping does. Home cooks treat toppings as the fun part and pile them on, not realizing that restraint is the actual technique. Pascarella’s “less is more” principle isn’t a stylistic preference, it’s structural: too much sauce and cheese physically prevents the crust from doing what a hot oven wants it to do.
If you take one thing from this article, prioritize the dough and the heat before you spend a single pound on toppings or gadgets. Everything else, including your first attempt at shaping by hand, gets easier once those two fundamentals are solid.
Building Your Shopping List for Pizza Night
Once you know what “authentic” actually requires, the shopping decision gets simple. Doughdorks builds its entire range around the exact workflow covered above: 00 flour, proper cold fermentation, and portioned dough balls that match AVPN’s 200 to 280 gram standard.

For your first order, match the SKU to your goal rather than just grabbing whatever’s cheapest. Want the most authentic result and don’t mind shaping dough yourself? Order the 48hr Neapolitan Pizza Dough by weight and portion it into 200 to 280 gram balls. Not sure yet whether you’ll get on with shaping fresh dough? Start with the tester pack of four dough balls before committing to a bigger box. Short on time on a weeknight? Pre-cooked Neapolitan bases skip the shaping step and go straight to topping.
A rough shopping checklist for four people: one dough ball per person, a bag of 00 flour for dusting your work surface, a block of fior di latte, and a tin of San Marzano-style tomatoes. Round it out with the Italian herb dough balls if you want a flavor variation on the base itself.
Delivery across England runs on cold-chain courier, with fresh dough arriving ready for the fridge and best used within the supplier’s stated window rather than left sitting. Head to the dough balls collection to pick your box size and get pizza night on the calendar.
Frequently Asked Questions
What is the best flour for authentic Neapolitan pizza at home? Italian 00 flour is the standard choice. It’s milled finer than regular bread flour, which improves how the dough absorbs water and stretches without tearing, giving you the light, airy texture typical of Neapolitan-style crusts.
How long should Neapolitan pizza dough ferment? A cold ferment of 24 to 48 hours in the fridge is recommended. The extra time lets enzymes break down starches into sugars, improving flavor and making the dough easier on digestion than a same-day mix.
Can I make Neapolitan-style pizza in a normal UK oven? Yes. A well-preheated baking stone or steel on the top rack, run at your oven’s maximum temperature, gets you close to authentic results. A countertop pizza oven gets even closer, since many reach 400°C or higher.
How much dough do I need per pizza? AVPN guidance puts a single dough ball at 200 to 280 grams, which shapes into roughly a 10 to 12 inch pizza, enough for one adult serving.
Why does my homemade pizza turn out soggy in the middle? Too much sauce or cheese is almost always the cause. Keep sauce to a thin layer, around 50ml per pizza, and don’t overload the cheese, or the center won’t cook through before the edges burn.
Are there gluten-free or vegan options for Neapolitan-style pizza? Gluten-free blends with xanthan gum can approximate the texture, though the result is denser than traditional dough. Vegan versions are simpler, since standard pizza dough contains no animal products; only the cheese needs substituting.
Sources
- Associazione Verace Pizza Napoletana (AVPN) – Neapolitan pizza recipe
- Michele Pascarella’s Neapolitan pizza recipes – The Independent
- Pizza making kits guide – Listful
Recommended
- Authentic Neapolitan Pizza Dough Balls - Ready Made Box of 8
- Best Pizza Dough Balls for Home Cooks (2026 Guide)
- Neapolitan Pizza Dough: Authentic Recipe for Home Ovens
- 48-Hour Neapolitan Pizza Dough Balls (20 box) | Dough Dorks
READY-MADE • FROZEN • UK DELIVERY
Skip the mixing. Keep proper dough in your freezer.
48-hour fermented, individually proofed in their own pot and delivered frozen across the UK. Defrost, stretch, top and bake.
-
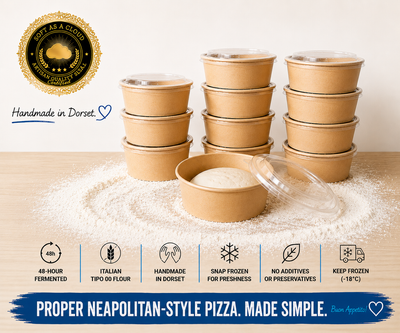 48-Hour Neapolitan-Style Pizza Dough Balls – Box of 12
£22.88
48-Hour Neapolitan-Style Pizza Dough Balls – Box of 12
£22.88
-
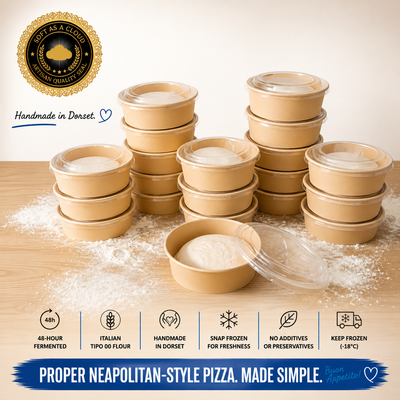 48-Hour Neapolitan-Style Pizza Dough Balls – Box of 20
£32.30
48-Hour Neapolitan-Style Pizza Dough Balls – Box of 20
£32.30
-
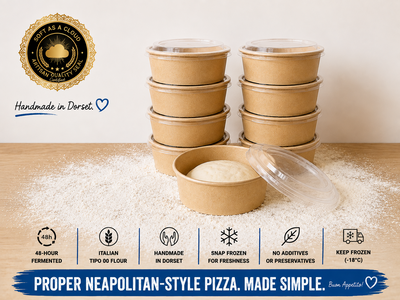 48-Hour Neapolitan-Style Pizza Dough Balls – Box of 8
£18
48-Hour Neapolitan-Style Pizza Dough Balls – Box of 8
£18
Handmade in Dorset • Free UK delivery over £50 • Free proofing pot with every dough ball