Gas vs Wood Pizza Oven: Which One Is Right for You?
Explore whether a gas or wood pizza oven is right for you. Discover the benefits of each to elevate your pizza-making experience!
If you cook pizza more than twice a month and want consistent results with minimal fuss, buy a gas oven. If you want the ritual, the smoke, and the craft of fire-building, wood is worth the extra effort. If you genuinely want both and will actually use both fuels, a dual-fuel model like the Ooni Karu or Gozney Dome earns its higher price. That’s the short version. Everything below explains why.
- Pick gas if you want to be cooking in 15–25 minutes, hit 800–950°F reliably, and repeat the same result every time. Gas wins on consistency, speed, and low effort.
- Pick wood if the campfire aroma and the process matter to you, you’re willing to spend 30–90 minutes getting the fire right, and you cook on weekends when time isn’t tight.
- Pick dual-fuel if you host regularly and want gas for weeknight pies but wood for Saturday entertaining. The Ooni Karu handles both; so does the Gozney Dome at the pro end.
Pro Tip: If you’re genuinely undecided, start with gas. You’ll cook more often, build better technique, and you can always add wood chips to a dual-fuel setup later when you’re ready to experiment.
Key Takeaways
Gas ovens are the practical choice for most home cooks, while wood suits craft-focused sessions where time and process are part of the appeal.
| Point | Details |
|---|---|
| Gas wins on convenience | Gas heats in 15–25 minutes, holds temperature precisely, and suits weeknight cooking with minimal effort. |
| Wood flavor is real but subtle | Smoke compounds add aroma, but 60–90 second Neapolitan bakes limit absorption — dough quality matters more. |
| Dual-fuel only if you’ll use both | Hybrids cost more and add complexity; only worth it if you’ll genuinely cook with wood at least monthly. |
| Costs are closer than expected | Propane runs ~$3–6 per session; seasoned hardwood varies widely but can match or exceed that cost. |
| Doughdorks dough closes the gap | 48-hour fermented Neapolitan dough improves results regardless of fuel, reducing the margin where oven choice matters. |
Table of Contents
- Gas vs wood pizza oven: the full comparison at a glance
- Does wood actually make pizza taste better?
- How hot do they get, and how fast?
- How easy is each fuel to control?
- What does each fuel actually cost?
- Safety, smoke, and local rules
- Are dual-fuel ovens worth the extra cost?
- What else can you cook in each oven?
- How to choose the right oven for your situation
- What the first 10 cooks actually feel like
- Recommended models worth researching
- My take on the gas vs wood debate
- Better dough makes both ovens perform
- Sources
Gas vs wood pizza oven: the full comparison at a glance
Both fuel types can reach the temperatures Neapolitan pizza demands. The real differences show up in how long you wait, how much you manage, and what you spend over time. Gas ovens typically heat up in 15–25 minutes, while wood ovens take 30–90 minutes depending on the oven’s thermal mass and how well the fire is built.
| Dimension | Gas (e.g., Ooni Koda, Gozney Roccbox) | Wood (e.g., Ooni Karu in wood mode) | Dual-fuel (e.g., Gozney Dome, Ooni Karu) |
|---|---|---|---|
| Best for | Weeknight cooks, beginners, consistency | Craft sessions, weekend entertaining, smoke flavor | Cooks who want both fuels; frequent hosts |
| Max temp & cook time | 800–950°F; 60–90 sec Neapolitan | 800–950°F; 60–90 sec | 800–950°F; varies by fuel in use |
| Heat-up time | 15–25 minutes | 30–90 minutes | 20–60 minutes (gas mode faster) |
| Temp control | Dial-precise; very consistent | Requires active fire management; variable | Gas mode: precise; wood mode: manual |
| Ease of use | Low learning curve | Moderate-to-high learning curve | Moderate; two systems to learn |
| Upfront cost | $300–$800 portable; $1,500+ pro | $300–$600 portable; $1,500–$5,000+ masonry | $600–$900 mid-range; $1,500–$5,000+ pro-style |
| Ongoing fuel cost | Propane ~$3–6/session; natural gas lower | Seasoned hardwood ~$2–8/session (varies widely) | Depends on fuel used |
| Maintenance | Minimal; wipe burner, check regulator | Ash removal after every cook; chimney cleaning | Both sets of maintenance apply |
| Portability | Excellent (propane); fixed (natural gas) | Good for smaller models; heavier for masonry | Good for portable hybrids; heavier pro models |
| Versatility | High-heat pizza, roasts, fast cooks | Pizza, bread, slow roasts, smoking | Full range of both |
| Smoke/emissions | Low particulates; CO₂ and water vapor | Higher particulates and PAHs; open flame | Wood mode: same as wood; gas mode: clean |
Quick stat: After testing multiple outdoor pizza ovens, Bon Appétit’s reviewers favored gas models for most home buyers because they deliver easier, more consistent results from cook to cook.
The table above covers the mechanics. The sections below go deeper on the decisions that actually matter.
Does wood actually make pizza taste better?
The honest answer: yes, but less than most people expect, especially for fast Neapolitan-style bakes.
Wood smoke contains phenolic compounds, specifically guaiacol and syringol, that create the campfire-like aroma associated with wood-fired pizza. These compounds do deposit on the crust. The catch is that a Neapolitan pizza cooks in 60–90 seconds at 850–950°F. That’s not much time for smoke to penetrate the dough, and the high heat means the crust is forming and sealing almost immediately. The smoke effect is real but subtle compared with, say, a slow-smoked brisket.
Where wood flavor becomes more noticeable:
- Longer cook times at lower temperatures (think Roman-style or pan pizza), where the crust has more exposure time
- Poorly managed fires that produce heavy, dirty smoke, which can actually make the pizza taste bitter rather than pleasantly smoky
- Added wood chunks or chips on a gas or dual-fuel setup, which lets you dial in smoke without managing a full wood fire
Gas, by contrast, burns clean and neutral. That’s an advantage when you’re cooking with delicate toppings like fresh burrata, light pesto, or white sauces that would be overwhelmed by smoke. It’s also why many professional pizza chefs use gas for consistency and add wood only when they want a specific flavor profile.
Pro Tip: If you want smoke flavor from a gas or dual-fuel oven, use small chunks of seasoned hardwood like oak, cherry, or apple. Avoid resinous woods like pine or spruce entirely — they produce acrid, unpleasant smoke that ruins the crust.
The bigger flavor lever, regardless of fuel, is your dough. A properly fermented Neapolitan pizza dough with 48 hours of cold fermentation brings far more complexity to the finished pizza than the fuel source does. The oven gets the crust to char; the dough determines what that crust actually tastes like.
Stat to know: The phenolic smoke compounds from wood can be detected on the crust, but short cooking times limit smoke absorption compared with longer-smoked foods.
How hot do they get, and how fast?
Both fuel types can hit the temperatures Neapolitan pizza requires. The difference is in how quickly they get there and how steadily they hold.
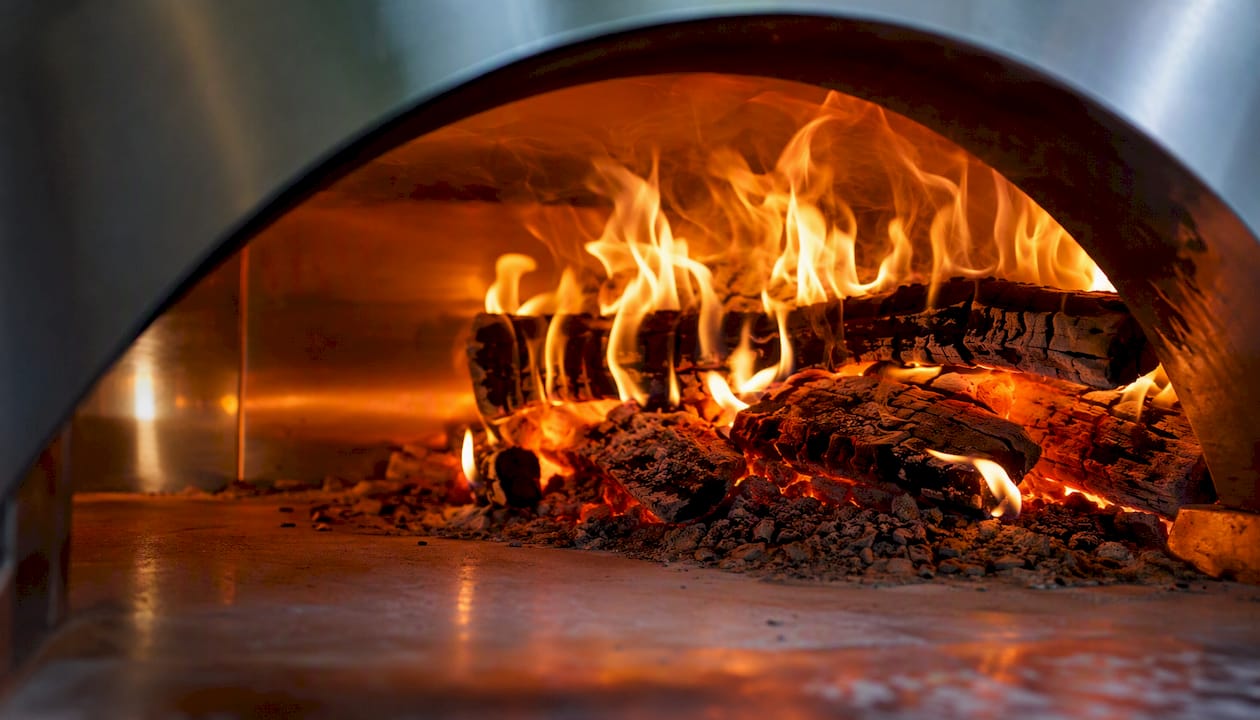
Gas and wood ovens alike can reach 900°F and above, which is the threshold for a proper Neapolitan crust with leopard spotting and a light char. Gas gets there faster and holds it more precisely. Wood gets there too, but the temperature fluctuates as the fire burns down, and you need to add fuel and manage airflow to maintain the sweet spot.
Typical performance ranges:
- Gas heat-up typically takes around 15 to 25 minutes to reach high cooking temperatures.
- Wood heat-up requires significantly longer times, often between 30 to 90 minutes depending on oven characteristics and fire management.
- Neapolitan pizzas cook very quickly at high temperatures, typically around 60 to 90 seconds.
- New York or Roman style at 600–700°F: 3–6 minutes
For batch cooking at a party, gas has a clear edge. A well-tuned gas oven recovers its floor temperature within 2–3 minutes between pies, which means you can run 8–10 pizzas per hour without a significant wait. A wood oven’s recovery time depends on how actively you’re managing the fire. If the fire banks down between pies, recovery can stretch to 5–8 minutes, cutting your output roughly in half.
Thermal mass also matters here. A heavy masonry or thick-stone oven stores heat and releases it evenly, which is great for long sessions but means a longer initial heat-up. Lighter portable ovens like the Ooni Koda heat fast but have less stored energy, so they’re more sensitive to cold ambient temperatures and wind.
How easy is each fuel to control?
Gas is straightforward. Turn the dial, watch the thermometer, adjust as needed. The Gozney Roccbox, for example, has a single burner control that lets you set and forget the temperature within a narrow band. For a beginner, that predictability is worth a lot.
Wood is a skill. You’re reading the fire, not a dial. The color of the flame, the position of the embers, the size of the logs, the damper position — all of it affects the oven floor temperature, and all of it changes as the session progresses. That’s part of the appeal for enthusiasts. For someone who just wants pizza on a Tuesday evening, it’s friction.
To control temperature with gas:
- Preheat with the burner on full for 15–20 minutes.
- Check the stone floor temperature with an infrared thermometer (aim for 750–850°F for Neapolitan).
- Reduce the flame slightly before launching the first pizza.
- Monitor recovery between pies and adjust the dial up or down.
To control temperature with wood:
- Build a small kindling fire and let it establish before adding larger splits.
- Push the fire to one side of the oven once the dome glows white (a sign the stone has absorbed heat).
- Add a small log every 10–15 minutes to maintain the fire without smothering it.
- Use the damper to regulate airflow and prevent temperature spikes.
- Check the floor temp with an infrared thermometer before each launch.
The infrared thermometer and a quality pizza peel are the two tools that shorten the learning curve for both fuel types. Without a floor temp reading, you’re guessing, and guessing leads to burnt bases or pale, undercooked crusts.
Pro Tip: For wood ovens, aim for a white-hot dome and a floor reading of 750–850°F before your first launch. If the floor is hotter than the dome, your fire is too aggressive — let it settle for 5 minutes before cooking.
What does each fuel actually cost?
Gas is usually cheaper to operate per session, and the gap widens if you install natural gas rather than relying on propane tanks.
Upfront price bands:
- Portable table-top (Ooni Koda 12, Gozney Roccbox): $300–$600
- Mid-range freestanding (Ooni Koda 16, Ooni Karu 16): $600–$900
- Pro-style (Gozney Dome, masonry builds): $1,500–$5,000+
Per-session fuel cost (rough estimates with clear assumptions):
| Fuel | Typical session length | Estimated cost |
|---|---|---|
| Propane (20 lb tank) | ~10–15 hours of cooking | ~$3–6 per 1-hour session |
| Natural gas (pipeline) | Continuous supply | ~$1–3 per session |
| Seasoned hardwood | 2–4 kg per session | ~$2–8 depending on local wood prices |
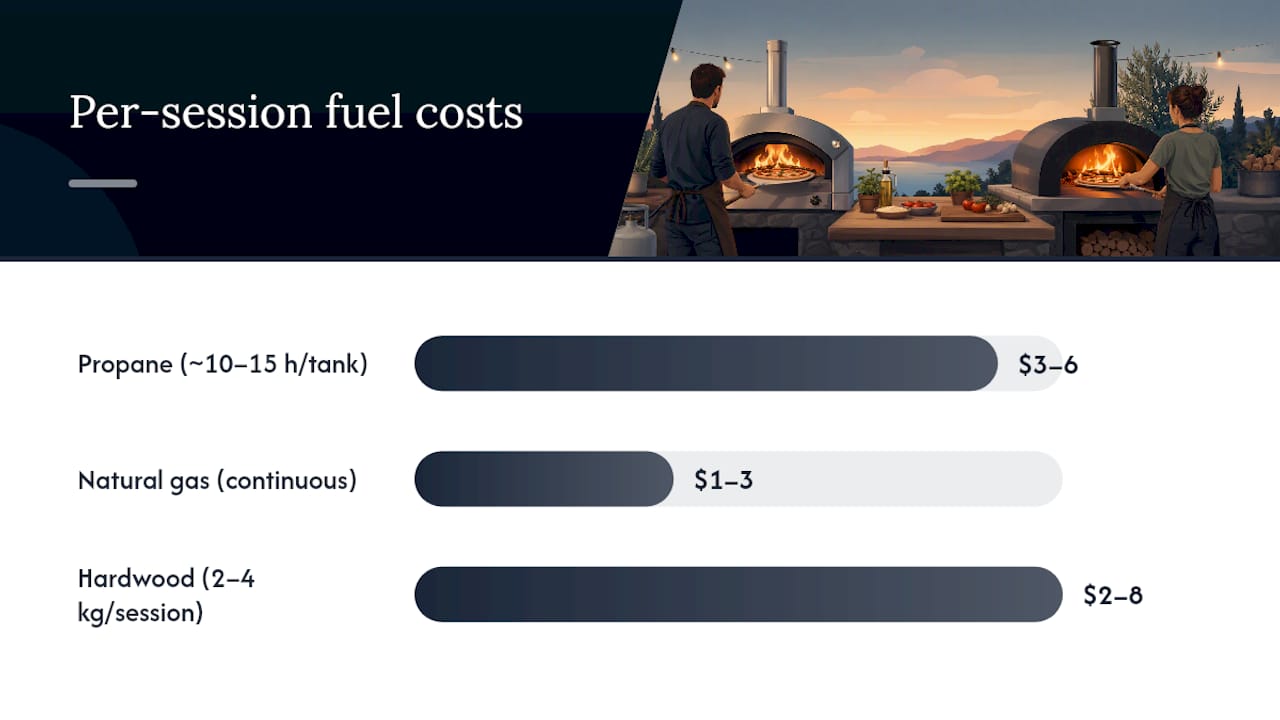
Natural gas is often the most convenient long-term fuel for a permanent outdoor installation because it removes tank refills entirely and provides a steady supply. Propane stays the better choice for portable setups. Wood costs vary enormously by region. If you have access to free or cheap seasoned hardwood, the per-session cost drops to near zero. If you’re buying kiln-dried hardwood from a retailer, it can match or exceed propane costs.
Maintenance costs to factor in:
- Gas: occasional burner inspection, regulator replacement every few years (~$20–$50), stone replacement if cracked
- Wood: ash disposal after every cook, chimney or flue cleaning 1–2 times per year, potential stone reseasoning
- Both: pizza stone replacement if cracked from thermal shock (avoid cold water on a hot stone)
Safety, smoke, and local rules
Gas combustion produces primarily CO₂ and water vapor, with far fewer particulates than wood. That matters if you’re cooking in a semi-enclosed space like a covered patio, a pergola, or near open windows. Wood releases particulate matter and polycyclic aromatic hydrocarbons (PAHs), which are the same compounds that make barbecue smoke a concern in enclosed spaces.
Basic safety rules for both fuel types:
- Maintain at least 3 feet of clearance from combustible surfaces (wood decking, fences, overhangs)
- Never use a propane oven indoors or in a garage, even with the door open
- Keep a dry-powder or CO₂ fire extinguisher within reach
- Check propane connections for leaks with soapy water before every session
- Store propane tanks upright, outdoors, away from heat sources
- For wood ovens, clear the area of dry leaves and debris before lighting
Urban and suburban areas increasingly restrict open wood burning. Many UK local authorities have smoke control zones where only approved fuels and appliances are permitted. Before buying a wood oven, check your local council’s rules. Gas ovens are almost universally permitted in residential outdoor settings, though some apartment buildings and managed properties prohibit open flames on balconies.
Pro Tip: Position a wood oven so the prevailing wind carries smoke away from your seating area and neighboring properties. A simple check before lighting — wet a finger and hold it up — takes five seconds and saves a lot of complaints.
Are dual-fuel ovens worth the extra cost?
Hybrids can be the best of both worlds, but only if you’ll genuinely use both fuels.
The Ooni Karu is the most accessible dual-fuel option. It ships as a wood/charcoal oven and accepts a gas burner attachment sold separately. The Gozney Dome is the premium version of the same concept, with a more refined burner system and greater thermal mass. Both let you run gas for a quick weeknight session and switch to wood when you have the time and inclination.
Trade-offs to weigh before buying a hybrid:
- Higher purchase price than a dedicated gas oven of comparable quality
- Two fuel systems to learn, maintain, and stock
- Some hybrid models need practice to avoid topping scorch when switching between fuels, since the thermal dynamics change
- The gas burner attachment for the Ooni Karu is sold separately, adding to the total cost
- Performance in wood mode is generally excellent; gas mode on some hybrids runs slightly cooler than a dedicated gas oven at the same price point
The buying rule here is simple: only choose a hybrid if you have a realistic plan to use wood at least once a month. If you’re buying it “just in case,” a dedicated gas oven at the same price will almost always be better built and easier to use. A properly engineered gas oven performs on par with wood for high-heat pizza — you’re not sacrificing pizza quality by going gas-only.
What else can you cook in each oven?
Pizza is the headline, but neither oven is a one-trick appliance.
Wood ovens are genuinely versatile across a wider temperature range. After a pizza session, as the fire dies down and the oven cools from 900°F toward 400–500°F, that residual heat is perfect for roasting. A whole chicken goes in after the last pizza and comes out 45 minutes later with crackling skin. Drop further to 300–350°F and you can bake sourdough bread with a crust that’s hard to replicate in a domestic oven. The banking heat also works for slow-cooked lamb shoulder or vegetables.
Gas ovens excel at high-heat, repeatable cooking. Pizza is the obvious use, but a gas oven at 700°F is also excellent for:
- Roasted vegetables with char and caramelization in under 10 minutes
- Flatbreads, naan, and pita in 90 seconds or less
- Whole fish or prawns at high heat
- Skillet steaks and chops using a cast iron pan placed directly on the stone
The limitation with gas is that you don’t get the slow, banking heat of a wood fire. Once you turn the burner off, the oven cools relatively quickly. That makes it less suited for the multi-hour, multi-temperature sessions that wood ovens handle naturally. For most home cooks, though, the gas oven’s versatility at high heat is more than enough.
How to choose the right oven for your situation
The single most useful question to ask yourself: how often will you actually use it?
If the answer is two or more times per week, gas is almost certainly the right call. The speed and consistency mean you’ll actually cook rather than talk yourself out of it because you don’t have time to build a fire.
Decision checklist:
- Weekly weeknight cook (2+ times/week): Gas. The 15–25 minute heat-up fits real life.
- Weekend entertaining (1–2 times/week): Gas or dual-fuel. Gas if you want simplicity; dual-fuel if you want the option to impress with wood.
- Occasional weekend host (1–3 times/month): Wood or dual-fuel. You have time to build the fire, and the ritual adds to the occasion.
- Craft-focused hobbyist: Wood. The learning curve is the point.
Questions to ask before you buy:
- Does the oven support natural gas, or propane only? (Natural gas requires a fixed installation and a compatible burner.)
- What is the burner recovery time between pies? (Under 3 minutes is good for gas; ask for wood oven thermal mass specs.)
- What wood species does the manufacturer recommend, and what size splits?
- What is the warranty on the burner, stone, and shell separately?
- Is a stand included, or sold separately? (Several mid-range models charge extra for the stand.)
Red flags at purchase:
- Vague temperature claims (“gets very hot”) with no specific °F or °C rating
- No recovery time data in the spec sheet
- Thin or unspecified stone thickness (thinner stones crack more easily and hold less heat)
- No mention of insulation material or dome construction
What the first 10 cooks actually feel like
With gas, the first cook is usually a success. The oven heats predictably, the temperature is readable, and the main variable is your launch technique. Expect to burn one or two bases from launching too early or leaving the pizza in 20 seconds too long. By cook five, most people have a reliable routine.
Wood is different. The first cook often produces uneven results: one side of the crust darker than the other, a base that’s either underdone or scorched, and a fire that keeps dying or running too hot. That’s normal. The learning curve is real, but it compresses quickly with deliberate practice.
What to track in your first 10 cooks (both fuel types):
- Stone floor temperature at launch (infrared thermometer, aim for 750–850°F)
- Dome temperature if your oven has a gauge
- Cook time per pizza (start a timer at launch)
- Recovery time between pies (how long before the floor is back to target temp)
- Any hot spots or cold spots on the stone (rotate the pizza at 30–45 seconds to check)
Pro Tip: For wood ovens, mark the dome color with a mental reference point. When the soot burns off and the dome glows a uniform white-gray, the oven is at temperature. That visual cue is faster and more reliable than waiting for a thermometer reading to stabilize.
For gas beginners, the most common mistake is launching before the stone floor is fully up to temperature. The burner may read 900°F at the dome while the stone is still at 600°F. Always check the floor, not just the dome.
Recommended models worth researching
These four ovens represent the most commonly cited options across the portable-to-pro range. They’re starting points for your research, not a ranked list.
-
Ooni Koda 12 / Koda 16 (gas): Propane-powered, heats to 950°F in about 15 minutes, compact footprint. The Koda 16 handles 16-inch pizzas and suits regular home use. Best for: beginners and frequent weeknight cooks who want zero fire management.
-
Ooni Karu 12G / Karu 16 (wood/multi-fuel): Ships as a wood and charcoal oven; gas burner attachment available separately. The Karu 16 has a built-in thermometer and a larger cooking surface. Best for: cooks who want the flexibility to use both fuels without buying two ovens. Note: the gas attachment adds to the total cost.
-
Gozney Roccbox (gas/portable): Dense, well-insulated shell that holds heat exceptionally well for its size. Reaches 950°F and has a built-in thermometer. Heavier than the Ooni Koda at a similar price. Best for: cooks who want a portable oven with pro-level heat retention and don’t mind the extra weight.
-
Gozney Dome (multi-fuel/pro-style): The premium option. Larger cooking surface, higher thermal mass, and a refined dual-fuel system that handles both gas and wood cleanly. Best for: serious home cooks or frequent entertainers who want a permanent outdoor kitchen centerpiece. Available with a stand; price sits at the top of the portable market.
All four are widely available in the UK. Check current pricing directly with retailers, as prices shift with promotions and new model releases.
My take on the gas vs wood debate
The gas vs wood debate gets more heated than it needs to. Most of the people arguing loudest for wood haven’t cooked on a well-tuned gas oven recently, and most of the people dismissing wood haven’t given themselves enough sessions to get past the learning curve.
Here’s what I actually think: for regular home use, gas wins on almost every practical measure. You cook more, you waste less dough, and you get better at the craft faster because the oven isn’t the variable. The flavor difference is real but narrow, especially when your dough is doing its job. A properly fermented 48-hour Neapolitan dough brings more to the finished pizza than the fuel source does.
Wood is worth it when the session itself is the point. Saturday afternoon, good company, a proper fire, and the patience to get it right. That’s a different kind of cooking, and it’s genuinely satisfying. But it’s a weekend activity, not a Tuesday-night routine.
The one thing I’d push back on hardest: don’t let the oven choice become an excuse to delay. A gas oven and great dough will produce better pizza than a wood oven and mediocre dough, every time.
Better dough makes both ovens perform
The oven you choose matters. The dough you put in it matters more.
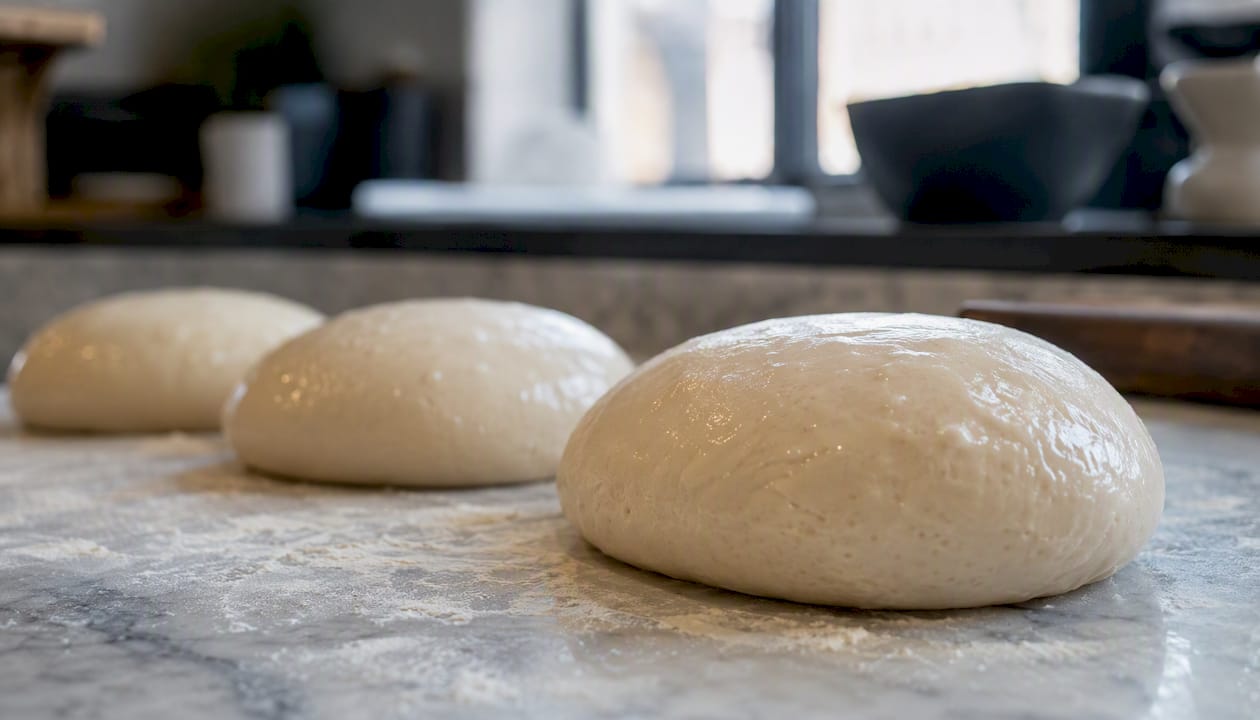
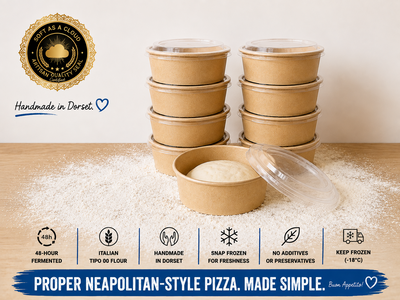
Doughdorks’ 48-hour fermented Neapolitan pizza dough is made with Italian 00 flour, fresh yeast, and extra virgin olive oil, cold-fermented for two full days to develop the flavor and extensibility that makes a crust genuinely light and charred rather than dense and bready. That fermentation process narrows the gap between a good gas cook and a great wood cook, because the dough itself is already doing the heavy lifting on flavor.

If you’re still getting your oven technique dialed in, the pre-cooked Neapolitan pizza bases give you a reliable foundation that’s forgiving of temperature variation. Either way, the ingredients are the part of the equation you can control from day one. Head to Doughdorks to see how to make your first pizza in three steps.
Sources
- Gas vs wood pizza oven: the differences you need to know — plus our top oven recommendations
- Best pizza ovens — Bon Appétit testing and recommendations
- The 5 best outdoor pizza ovens: Wood-fired, gas, propane (2026) — WIRED
- Pizza Oven Picks — Pizza oven gas vs wood: ultimate 2025 guide
- Why choose a natural gas pizza oven? — Gozney
This article provides general guidance for home cooks. For local fire regulations, smoke control zone rules, and gas installation requirements, check with your local authority or a qualified installer before purchasing.
Recommended
- Authentic Neapolitan Pizza Dough Balls - Ready Made Box of 8
- 10 Home Pizza Oven Accessories That Matter - Dough Dorks
- Ready Made Pizza Bases Guide for Better Pizza - Dough Dorks
- The Best Mozzarella for Pizza: A Home Cook’s Guide
READY-MADE • FROZEN • UK DELIVERY
Skip the mixing. Keep proper dough in your freezer.
48-hour fermented, individually proofed in their own pot and delivered frozen across the UK. Defrost, stretch, top and bake.
-
 48-Hour Neapolitan-Style Pizza Dough Balls – Box of 12
£22.88
48-Hour Neapolitan-Style Pizza Dough Balls – Box of 12
£22.88
-
 48-Hour Neapolitan-Style Pizza Dough Balls – Box of 20
£32.30
48-Hour Neapolitan-Style Pizza Dough Balls – Box of 20
£32.30
-
 48-Hour Neapolitan-Style Pizza Dough Balls – Box of 8
£18
48-Hour Neapolitan-Style Pizza Dough Balls – Box of 8
£18
Handmade in Dorset • Free UK delivery over £50 • Free proofing pot with every dough ball